Memcached is a free, high-performance and distributed memory object caching system written in C language. It is often used to speed up dynamic database-driven websites by caching data and objects in RAM to reduce the number of times an external data source (such as a database or API) must be read..
Memcached works by storing the content of the website database table and query in the memory, increasing website performance drastically. Memcached is now used by many companies including Facebook, Reddit, Wikipedia, Craigslist, Yellowbot, YouTube, Pinterest, Google App Engine, Google Cloud Platform…
In this tutorial I will instruct you how to install Memcached on CentOS 6, 7, 8 and config Memcached in WordPress to speed up your site.
Installing Memcached on CentOS 8
We will use the default dnf package manager to install Memcached by the following command:
dnf install memcached libmemcached -y
After Memcached has been installed, you need to enable it
systemctl enable memcached --now

Installing Memcached on CentOS 6, 7
## CentOS 7 and 6
yum install memcached
Installing Memcached on Ubuntu 18.04
apt-get install memcached libmemcached-tools php-memcached -y
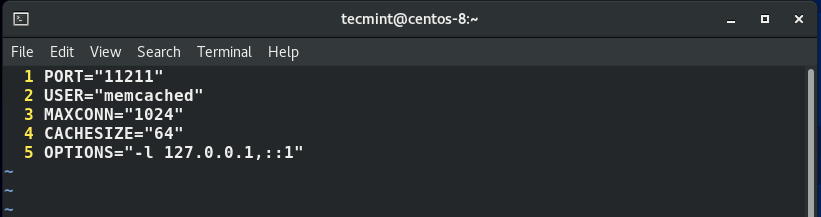
Configuring Memcached on CentOS
The configuration of Memcached is located in the /etc/sysconfig/memcached file on CentOS and /etc/memcached.conf on Ubuntu. In this file you can edit cache size for Memcached depend on memory capacity on your server.
Configuring Memcached on Ubuntu
nano /etc/memcached.conf
# Run memcached as a daemon. This command is implied, and is not needed for the
-d

# Log memcached's output to /var/log/memcached
logfile /var/log/memcached.log

# memory
-m 2048

# Default connection port is 11211
-p 11211

# Run the daemon as root. The start-memcached will default to running as root if no
# -u command is present in this config file
-u memcache

# Specify which IP address to listen on. The default is to listen on all IP addresses
-l 127.0.0.1

# Limit the number of simultaneous incoming connections. The daemon default is 1024
-c 500

# Use a pidfile
-P /var/run/memcached/memcached.pid
After edited config file, you don’t forget to restart Memcached by command
systemctl restart memcached
Next we need to allow Memcached port on IPtables Firewall and then restart IPtables (on CentOS) or UFW firewall (on Ubuntu)
Allow Memcached port on CentOS
iptables -A INPUT -m state --state NEW -m tcp -p tcp --dport 11211 -j ACCEPT
service iptables restart
Allow Memcached port on Ubuntu
sudo ufw allow from client_server_private_IP/32 to any port 11211
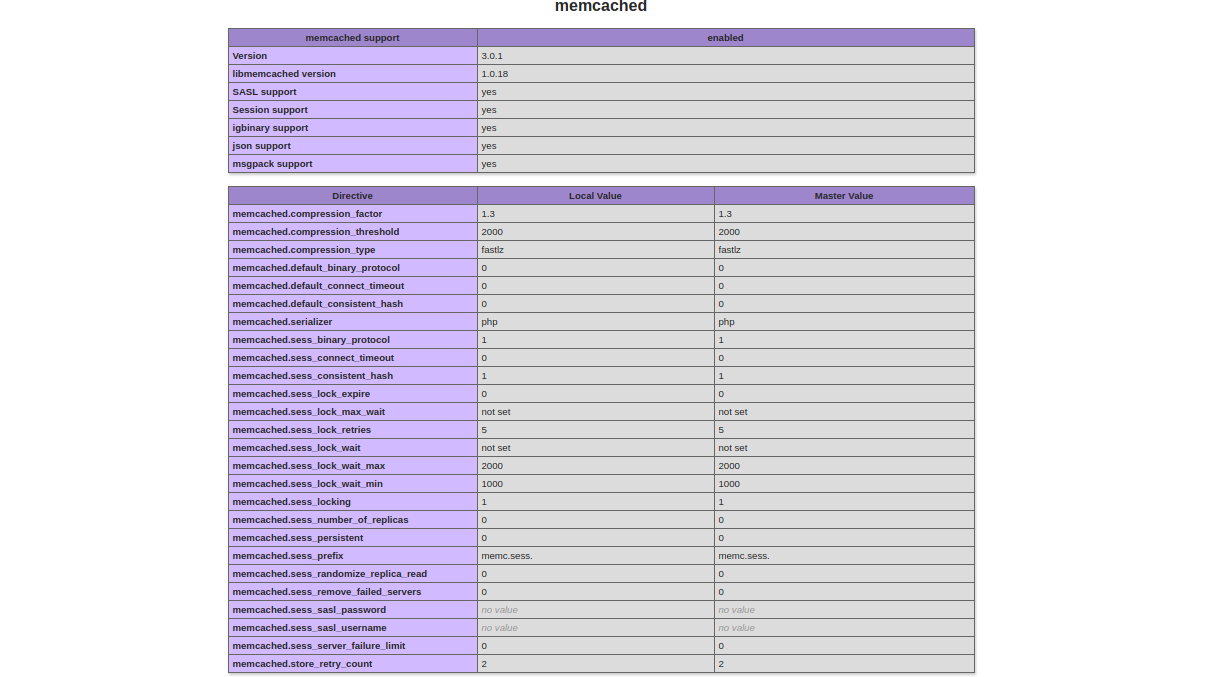
Test Memcached is working?
To test Memcached is recogrnized by PHP you need to create a test php file in public_html
nano /var/www/html/test.php
Then add the following lines
<?php
phpinfo();
?>
Save and close the file. Then access the URL http://your-server-ip/test.php. You should get the following page if Memcached enabled:
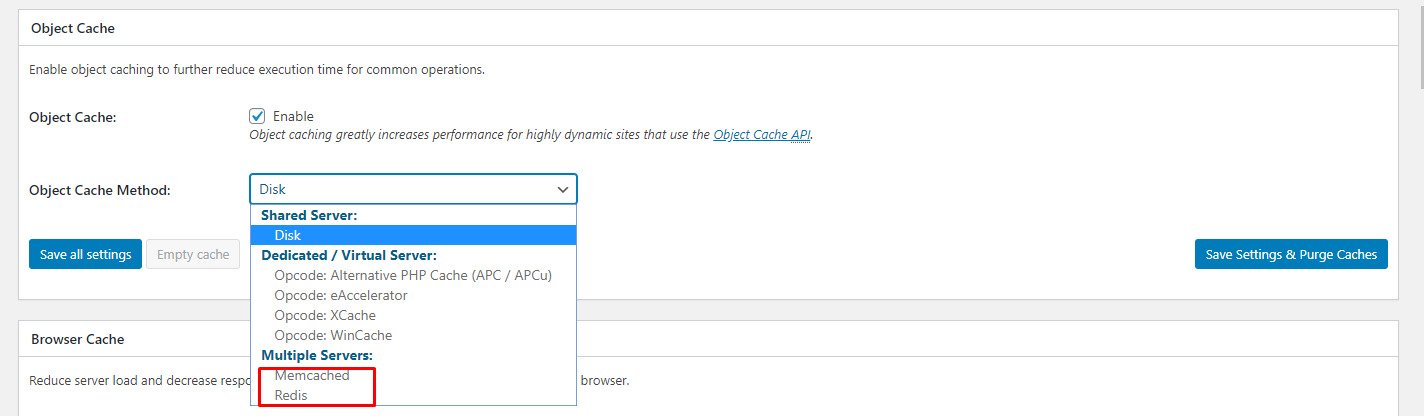
Setup Memcached for WordPress to speedup your WordPress site
To speedup WordPress site you need to install W3 total cache at wordpress.org/plugins/w3-total-cache/, then go to Performance ->Page Cache page and set Memcached for Object Cache Method.