
RabbitMQ Management is a user-friendly web interface that allows us to monitor and handle our RabbitMQ Server from a web browser. By using RabbitMQ Management we can
- Managing exchanges, queues, bindings, users, virtual hosts, policies, runtime parameters and user permissions. Exporting and importing schema (vhosts, users, permissions, queues, exchanges, bindings, parameters, policies)
- Monitor queue length, message rates (globally and per queue, exchange or channel), resource usage of queue, node GC activity, data rates of client connections, and more. Force close client connections, purge queues.
- Send and receive messages for debugging
- Monitor node resource use: sockets and file descriptors, memory usage breakdown, available disk space and bandwidth usage on inter-node communication links.
In this article, I will instruct you on how to use RabbitMQ Management.
Go to RabbitMQ Management
In the previous post, I showed you how to Install RabbitMQ and how to start RabbitMQ Server.
After starting RabbitMQ, we can monitor and manage RabbitMQ from the web interface on port 15672 . You can access this page by the following URL: http://localhost:15672/ with default username and password as guest/guest .
After logging in, you will see the following results:
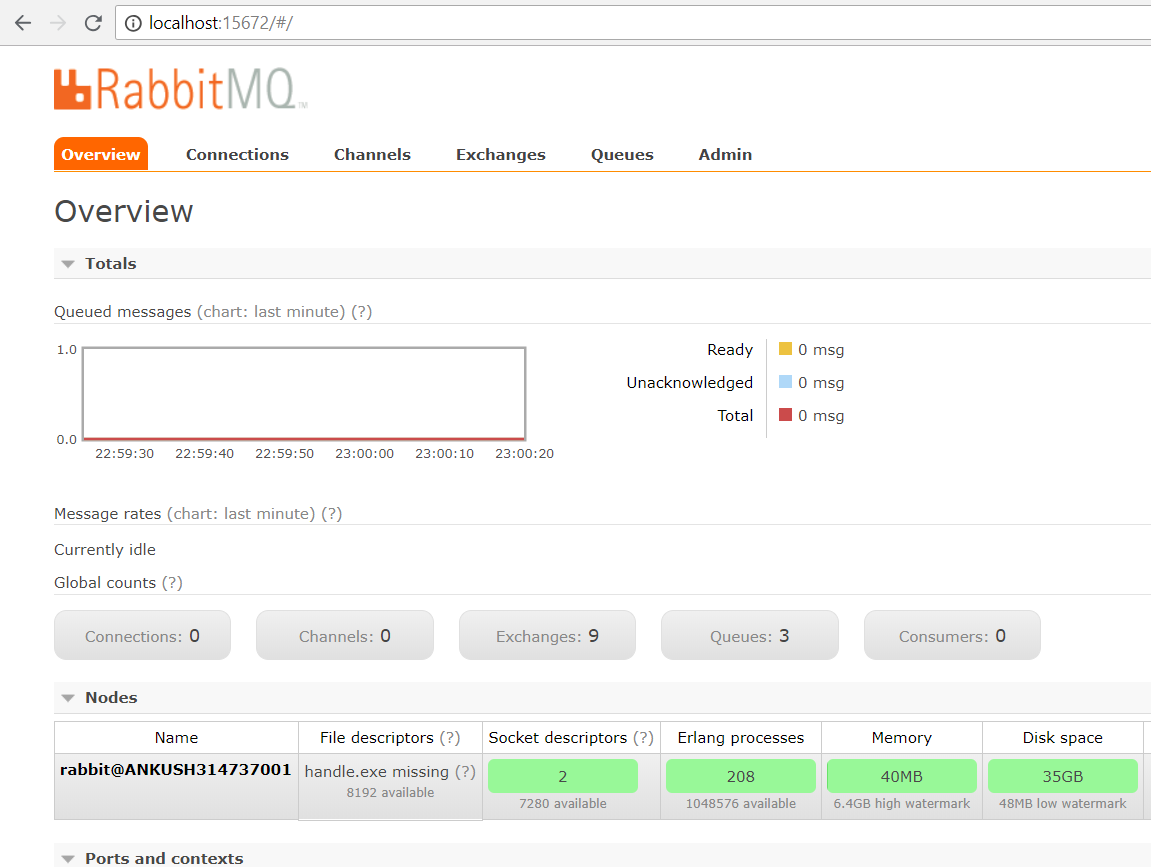
RabbitMQ Overview
The Overview page displays 2 charts, one for the Messages in the Queue and the other for the message rate. You can change the time period displayed in the chart by pressing the tab last minute above the chart. Information about all the different states for the message can be found by pressing (?).
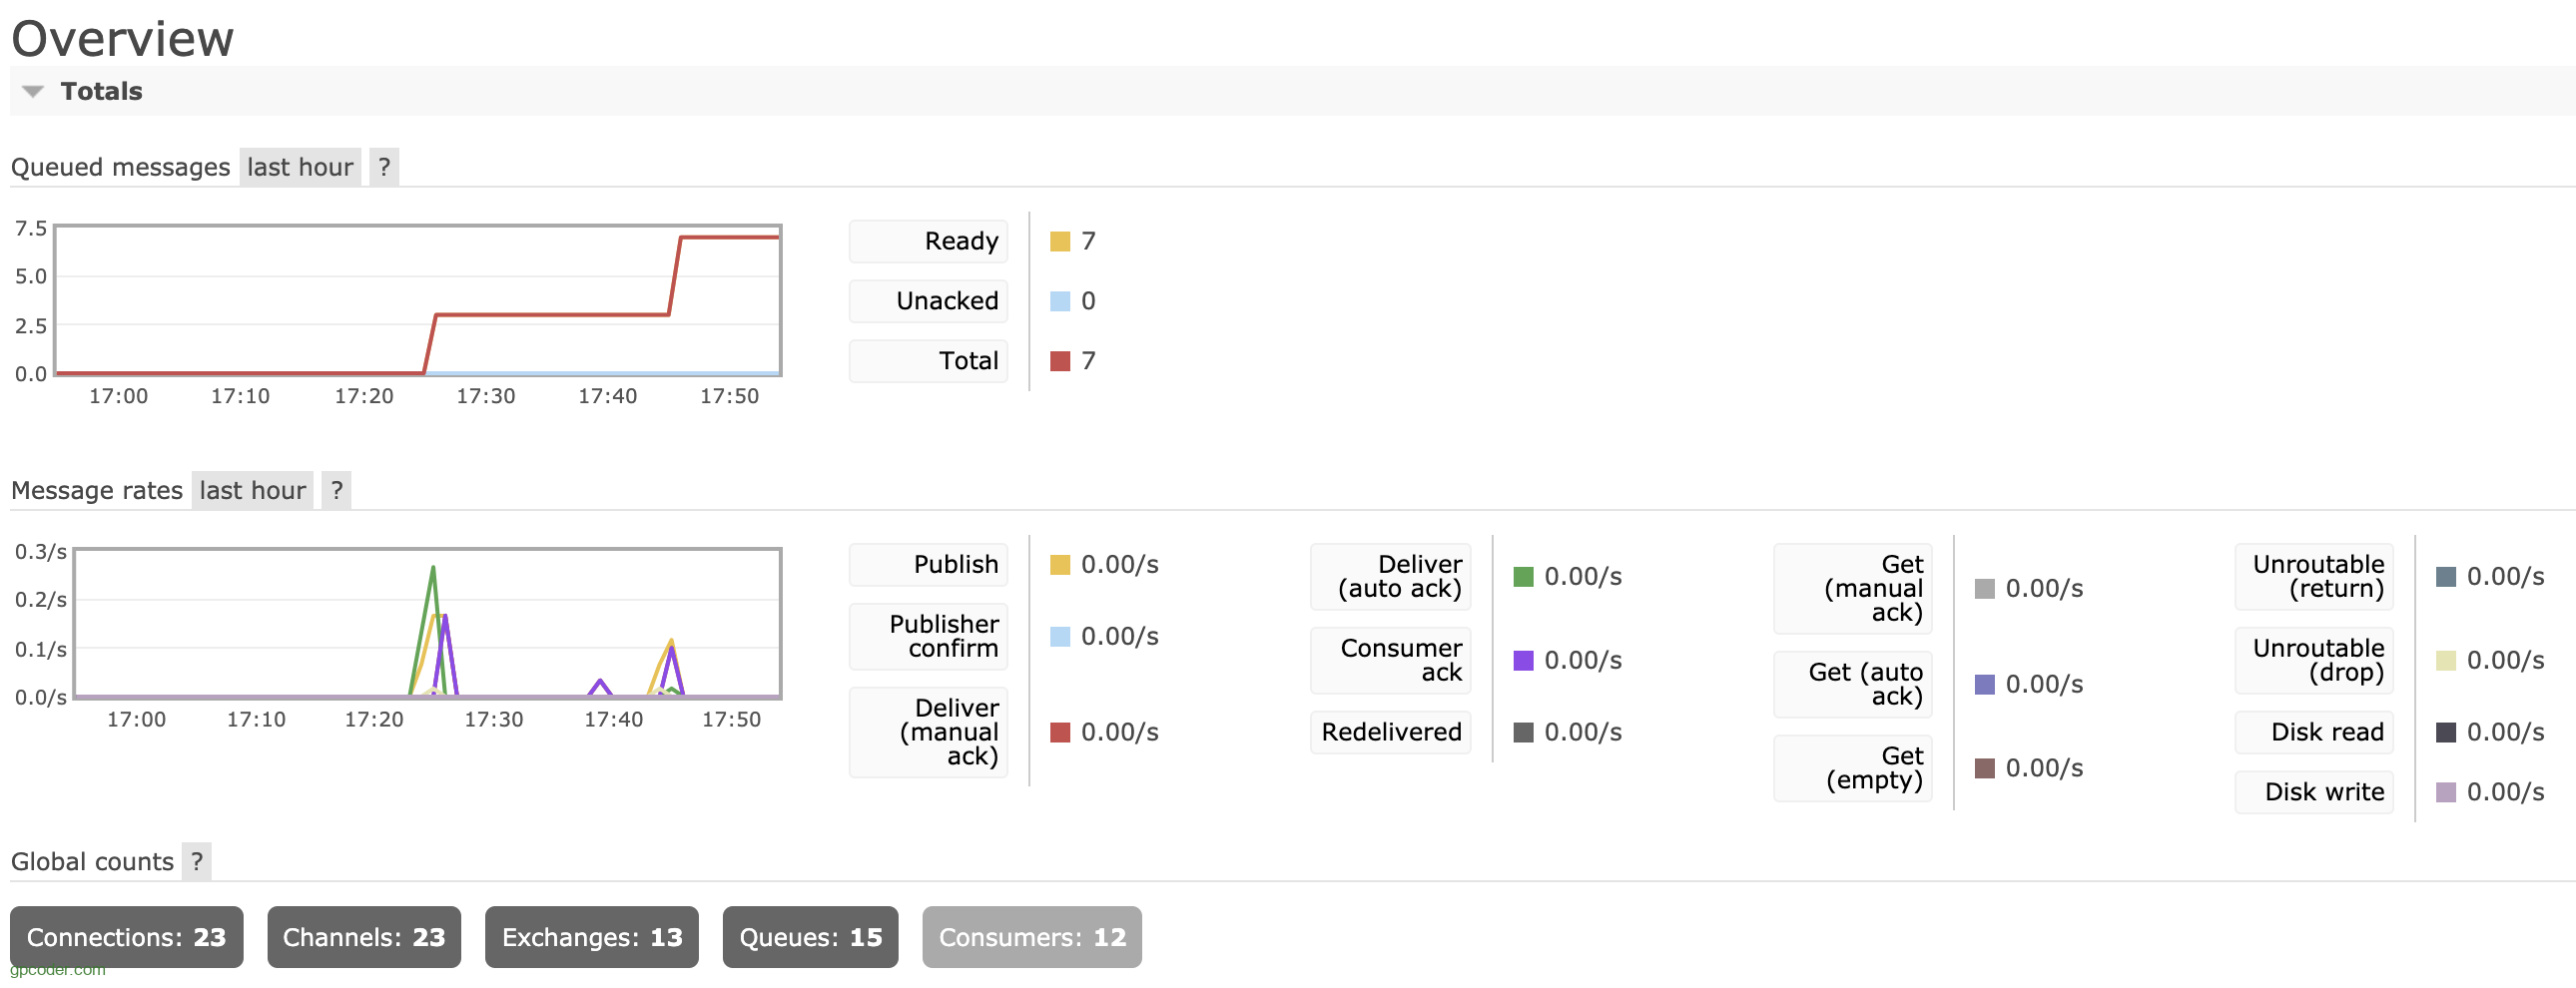
Queued messages : The graph shows the total number of messages in all Queues.
- Ready : displays the number of messages available to be sent.
- Unacked : the number of messages that server is waiting for confirmation.
- Total : the total number of messages queued in all Queues.
Messages rate: The graph shows the rate of processing messages.
- Publish : displays the speed of messages sent to the server.
- Publisher confirm : displays the speed that the server is confirming.
- Deliver (manual ack) / Deliver (auto ack): displays the speed of sending ack messages manually and automatically.
- Get (manual ack) / Get (auto ack): displays the speed of receiving ack messages manually and automatically.
- Redeliverd: displays the speed of resending messages.
- Disk read/write: displays the speed of reading and writing data to the disk.
Global Count : Total Connection, Channel, Exchage, Queue and Consumer for ALL virtual hosts to which the current user has access.
Nodes
Displaying information about the different Nodes in the RabbitMQ cluster (cluster is a group of Nodes or a group of computers). Here you can see information about server memory (Memory), number of Erlang processes per Node, Disk space, server start time (Uptime), …

Churn statistics
Displays the rate of new (created) or closed (closed) connections, channels, queues.

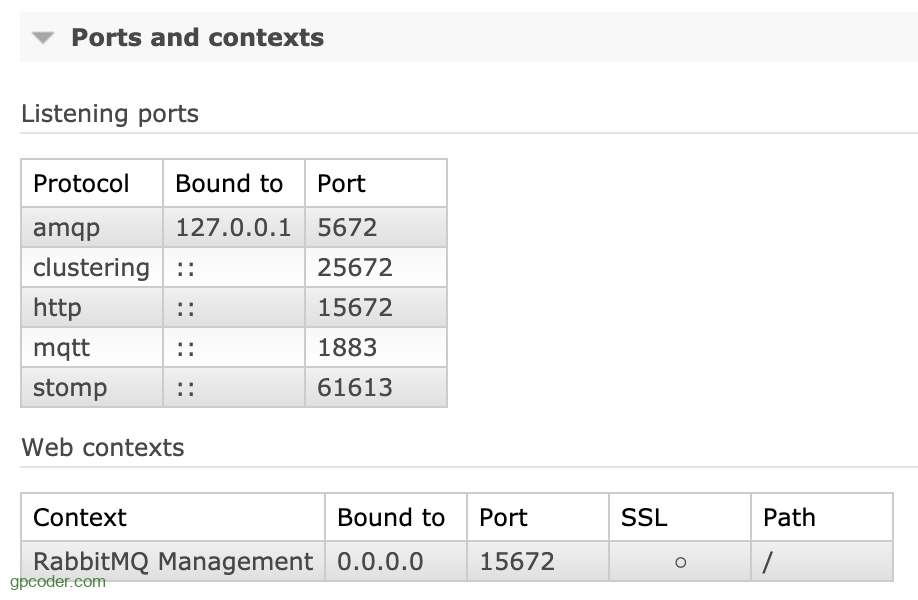
Ports and contexts
Listening ports for different protocols can be found here.
Import export definitions
It is possible to import and export definitions and configure all information for the RabbitMQ broker.
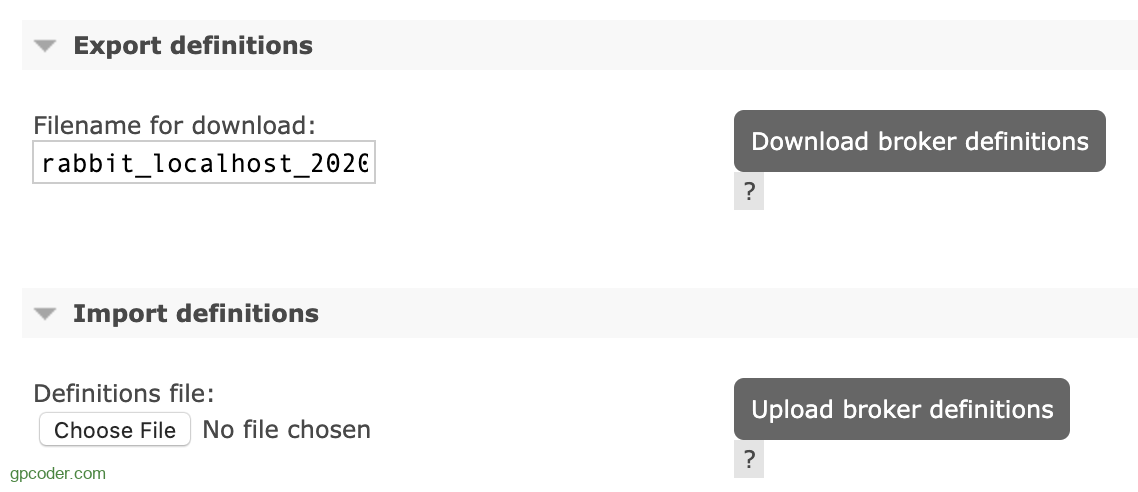
When we export the definitions, we get a JSON file representing the broker (RabbitMQ). This can be used to restore Exchange, Queue, virtual host, policy, user, etc. This feature can be used as a backup. Every time you change the configuration, you can keep the old settings to restore when needed.
Connections
RabbitMQ Connection is a TCP connection between the application and the RabbitMQ broker. When the client disconnects or a system failure occurs, the connection is closed.
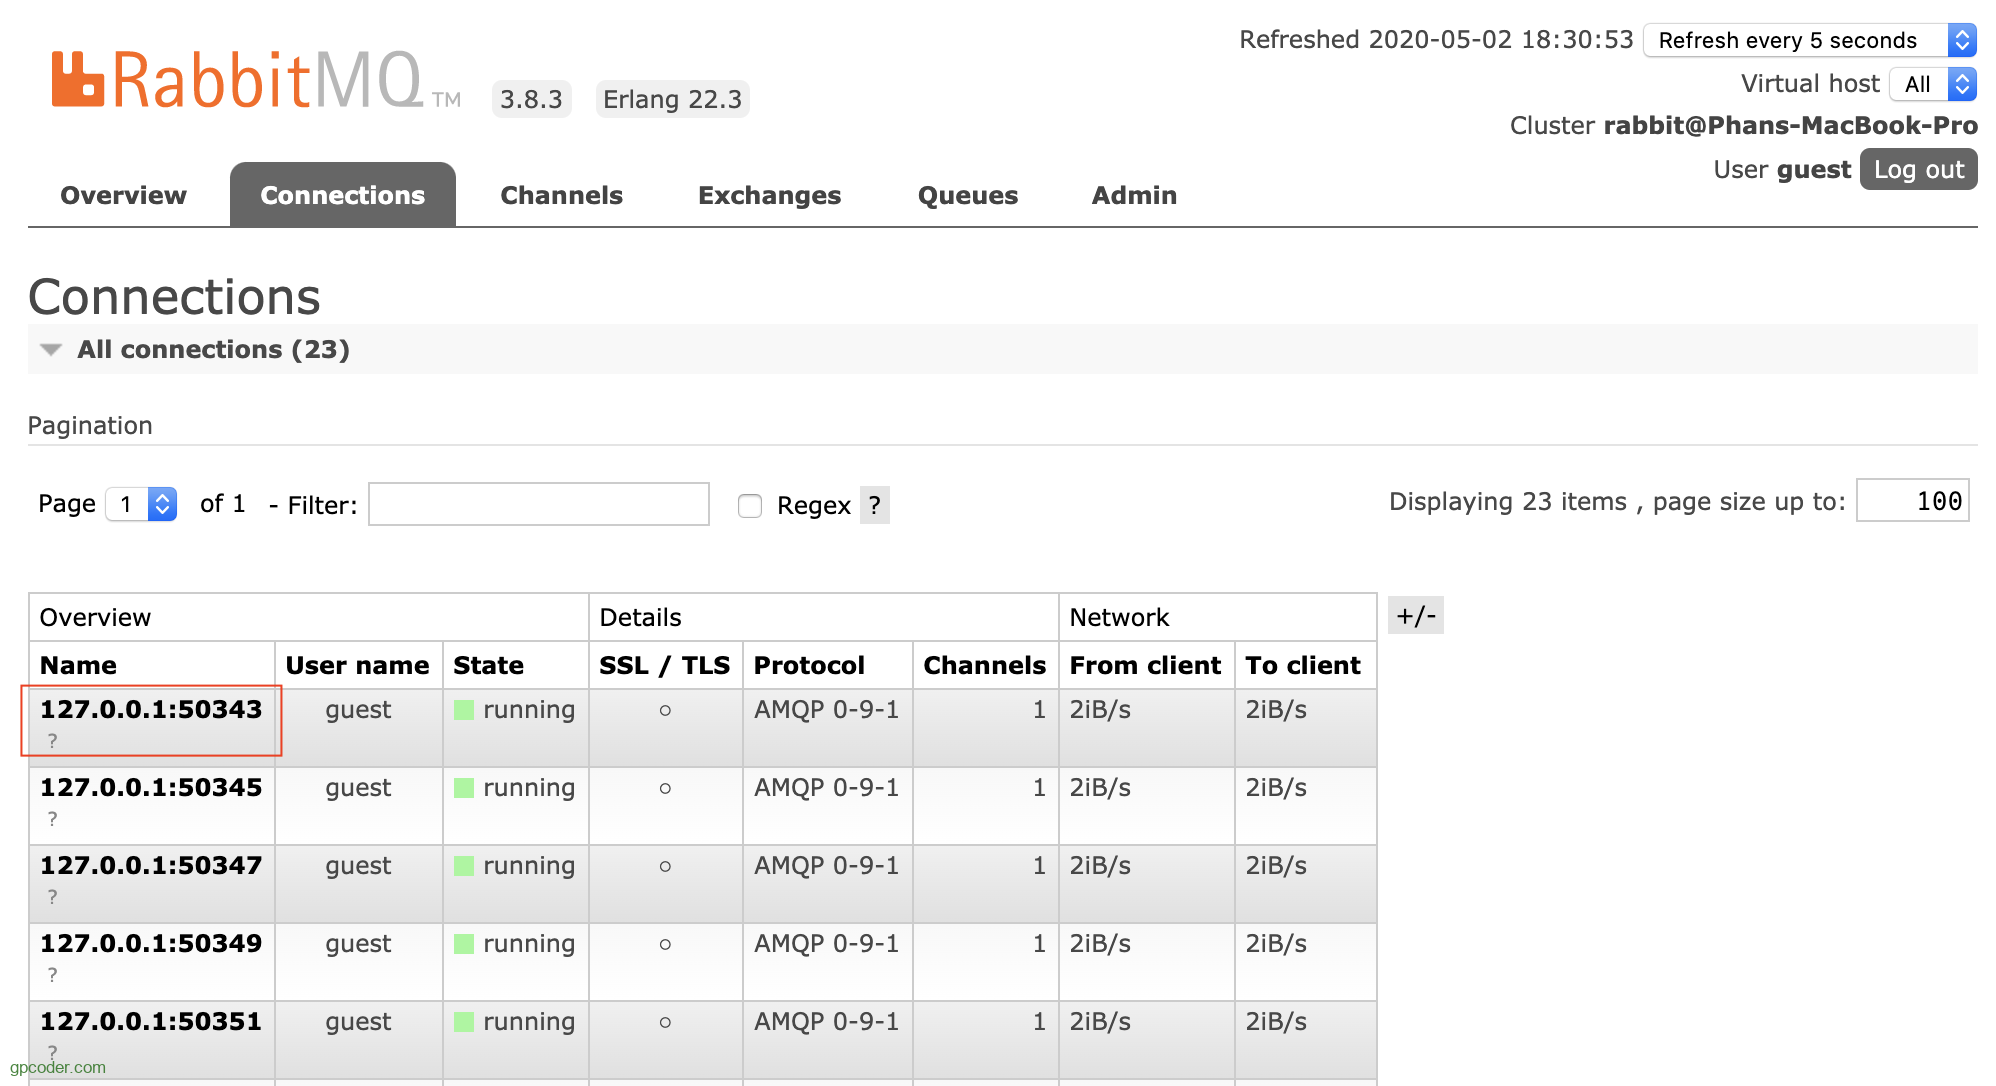
The Connection page shows the connections established to the RabbitMQ server.
- overview shows IP address, username associated with connection, Connection status.
- Channels indicates the number of channels using the connection.
- SSL/TLS indicates whether the connection is secured with SSL.
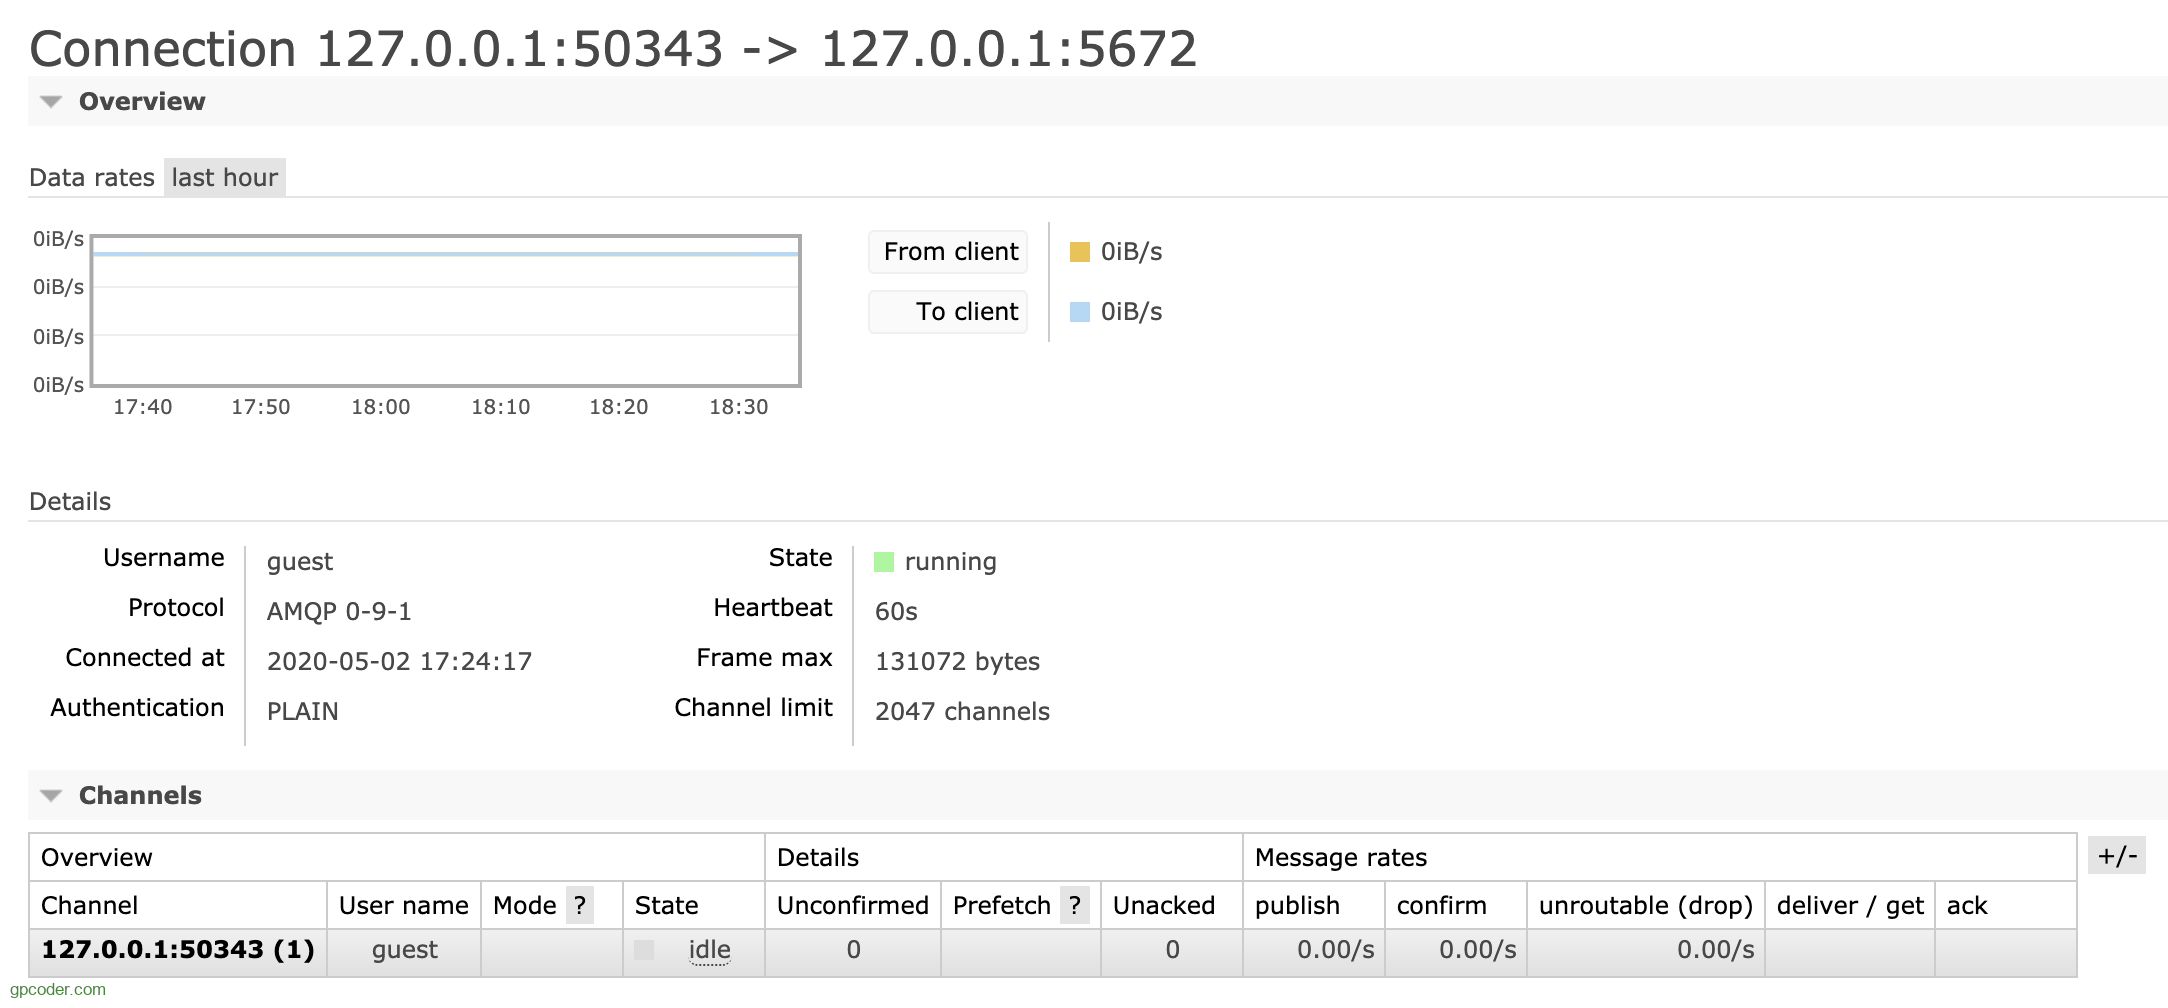
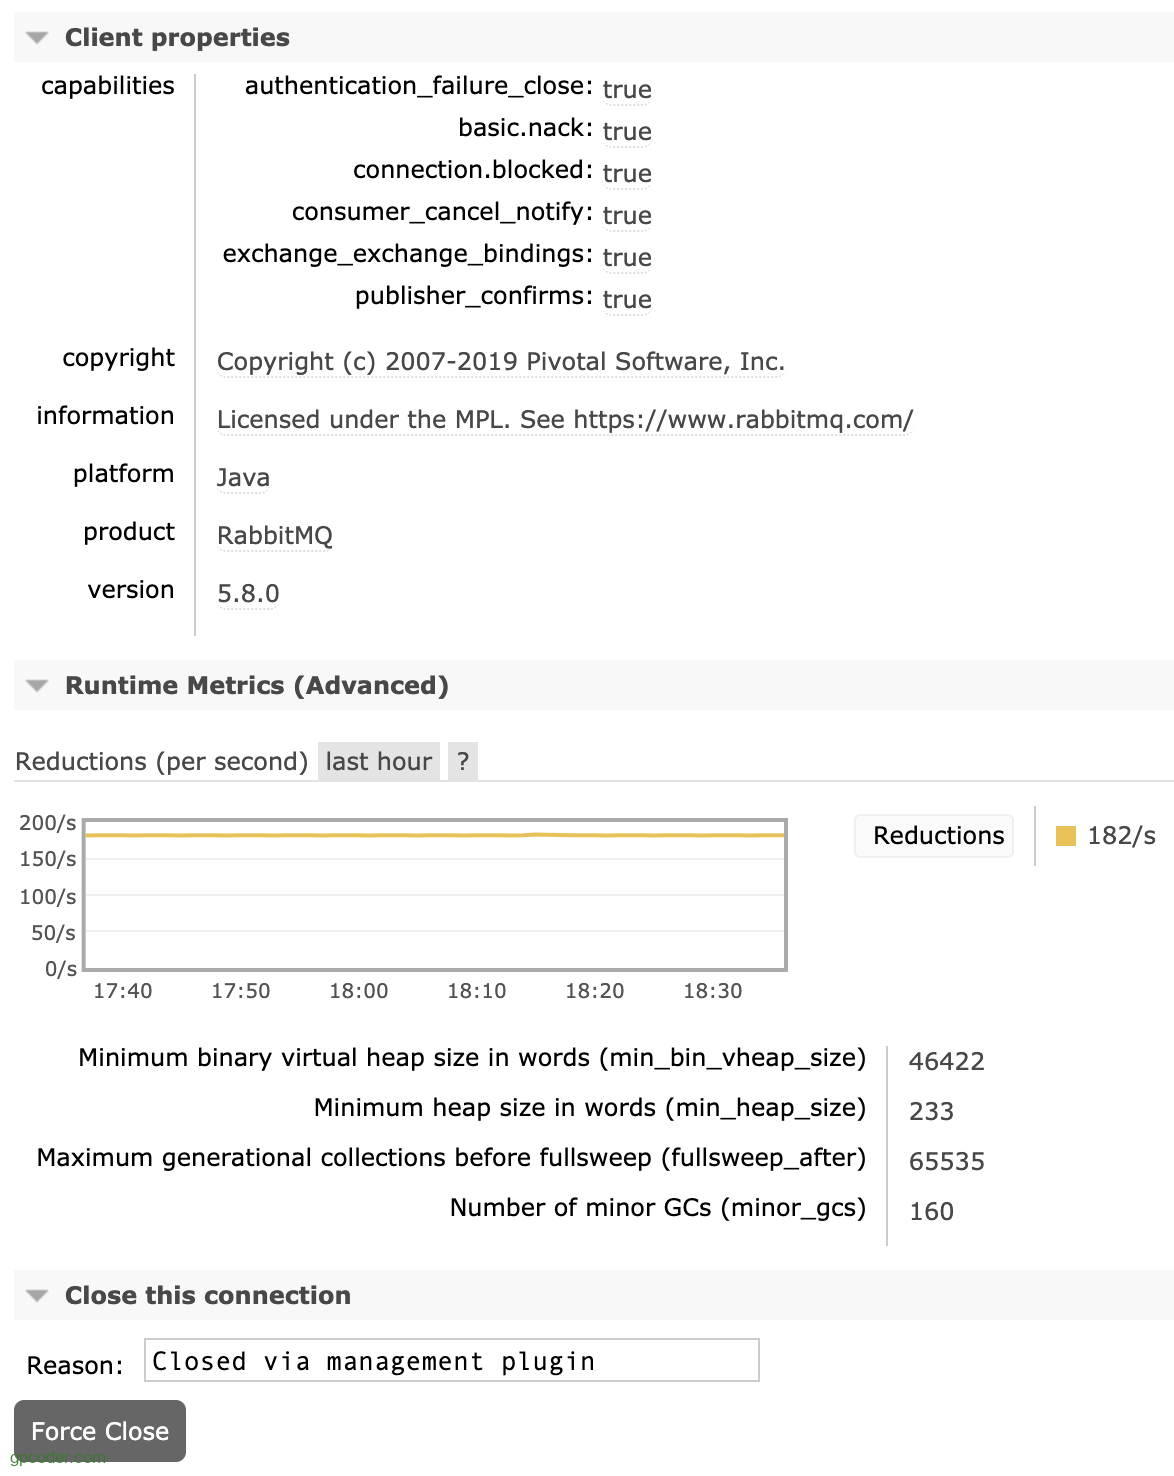
If you click on one of the connections, you will get an overview of that particular connection. Can view channels in connection and data rate. You can see the Client properties and you can close the connection if you want (Force Close).
Channels
RabbitMQ Channel is a virtual connection inside a connection. It reuses a connection, forgoing the need to reauthorize and open a new TCP stream. When messages are published or consumed, it is done over a channel. Many channels can be established within a single connection.
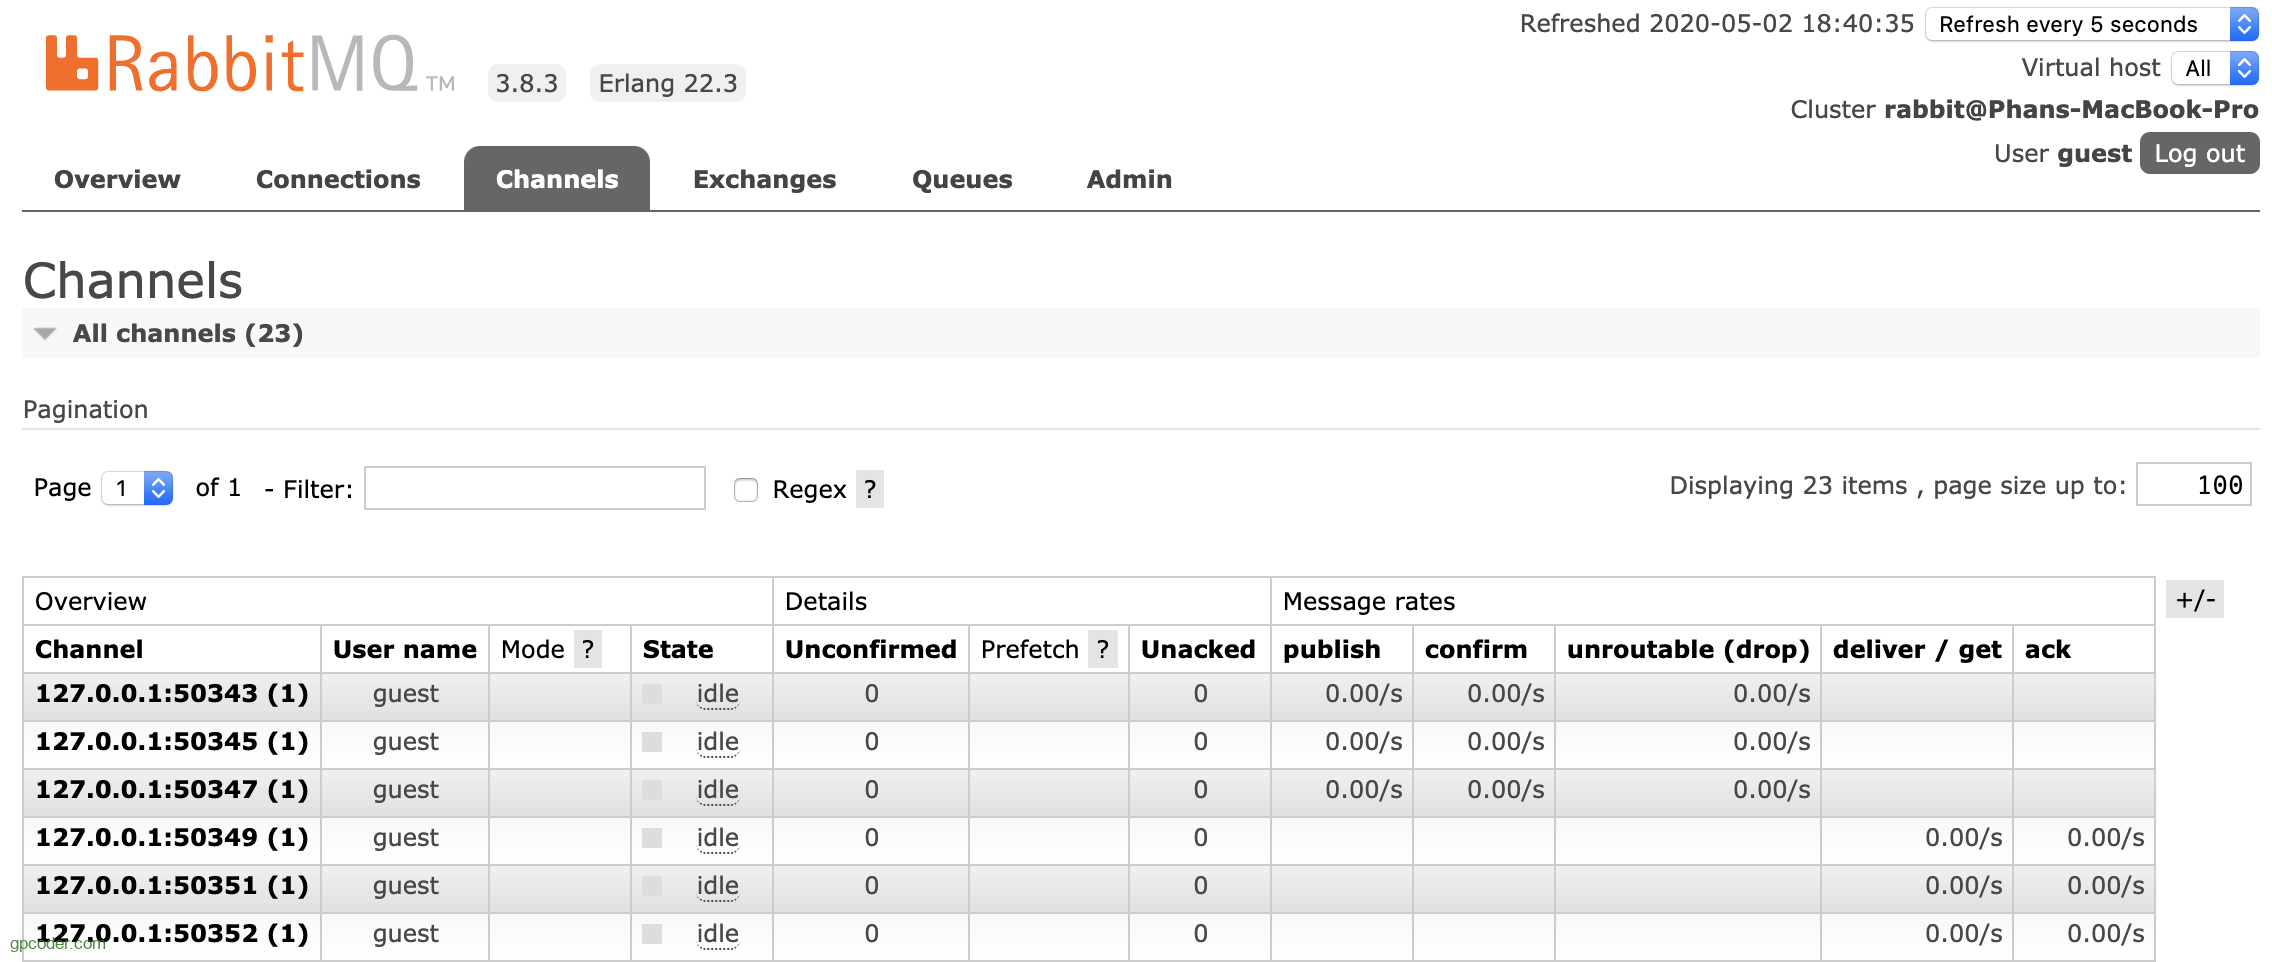
The Channels page displays information about all current Channels.
- Displays the username the user is associated with the channel, connection status, confirmation, etc.
- Message exchange rate.
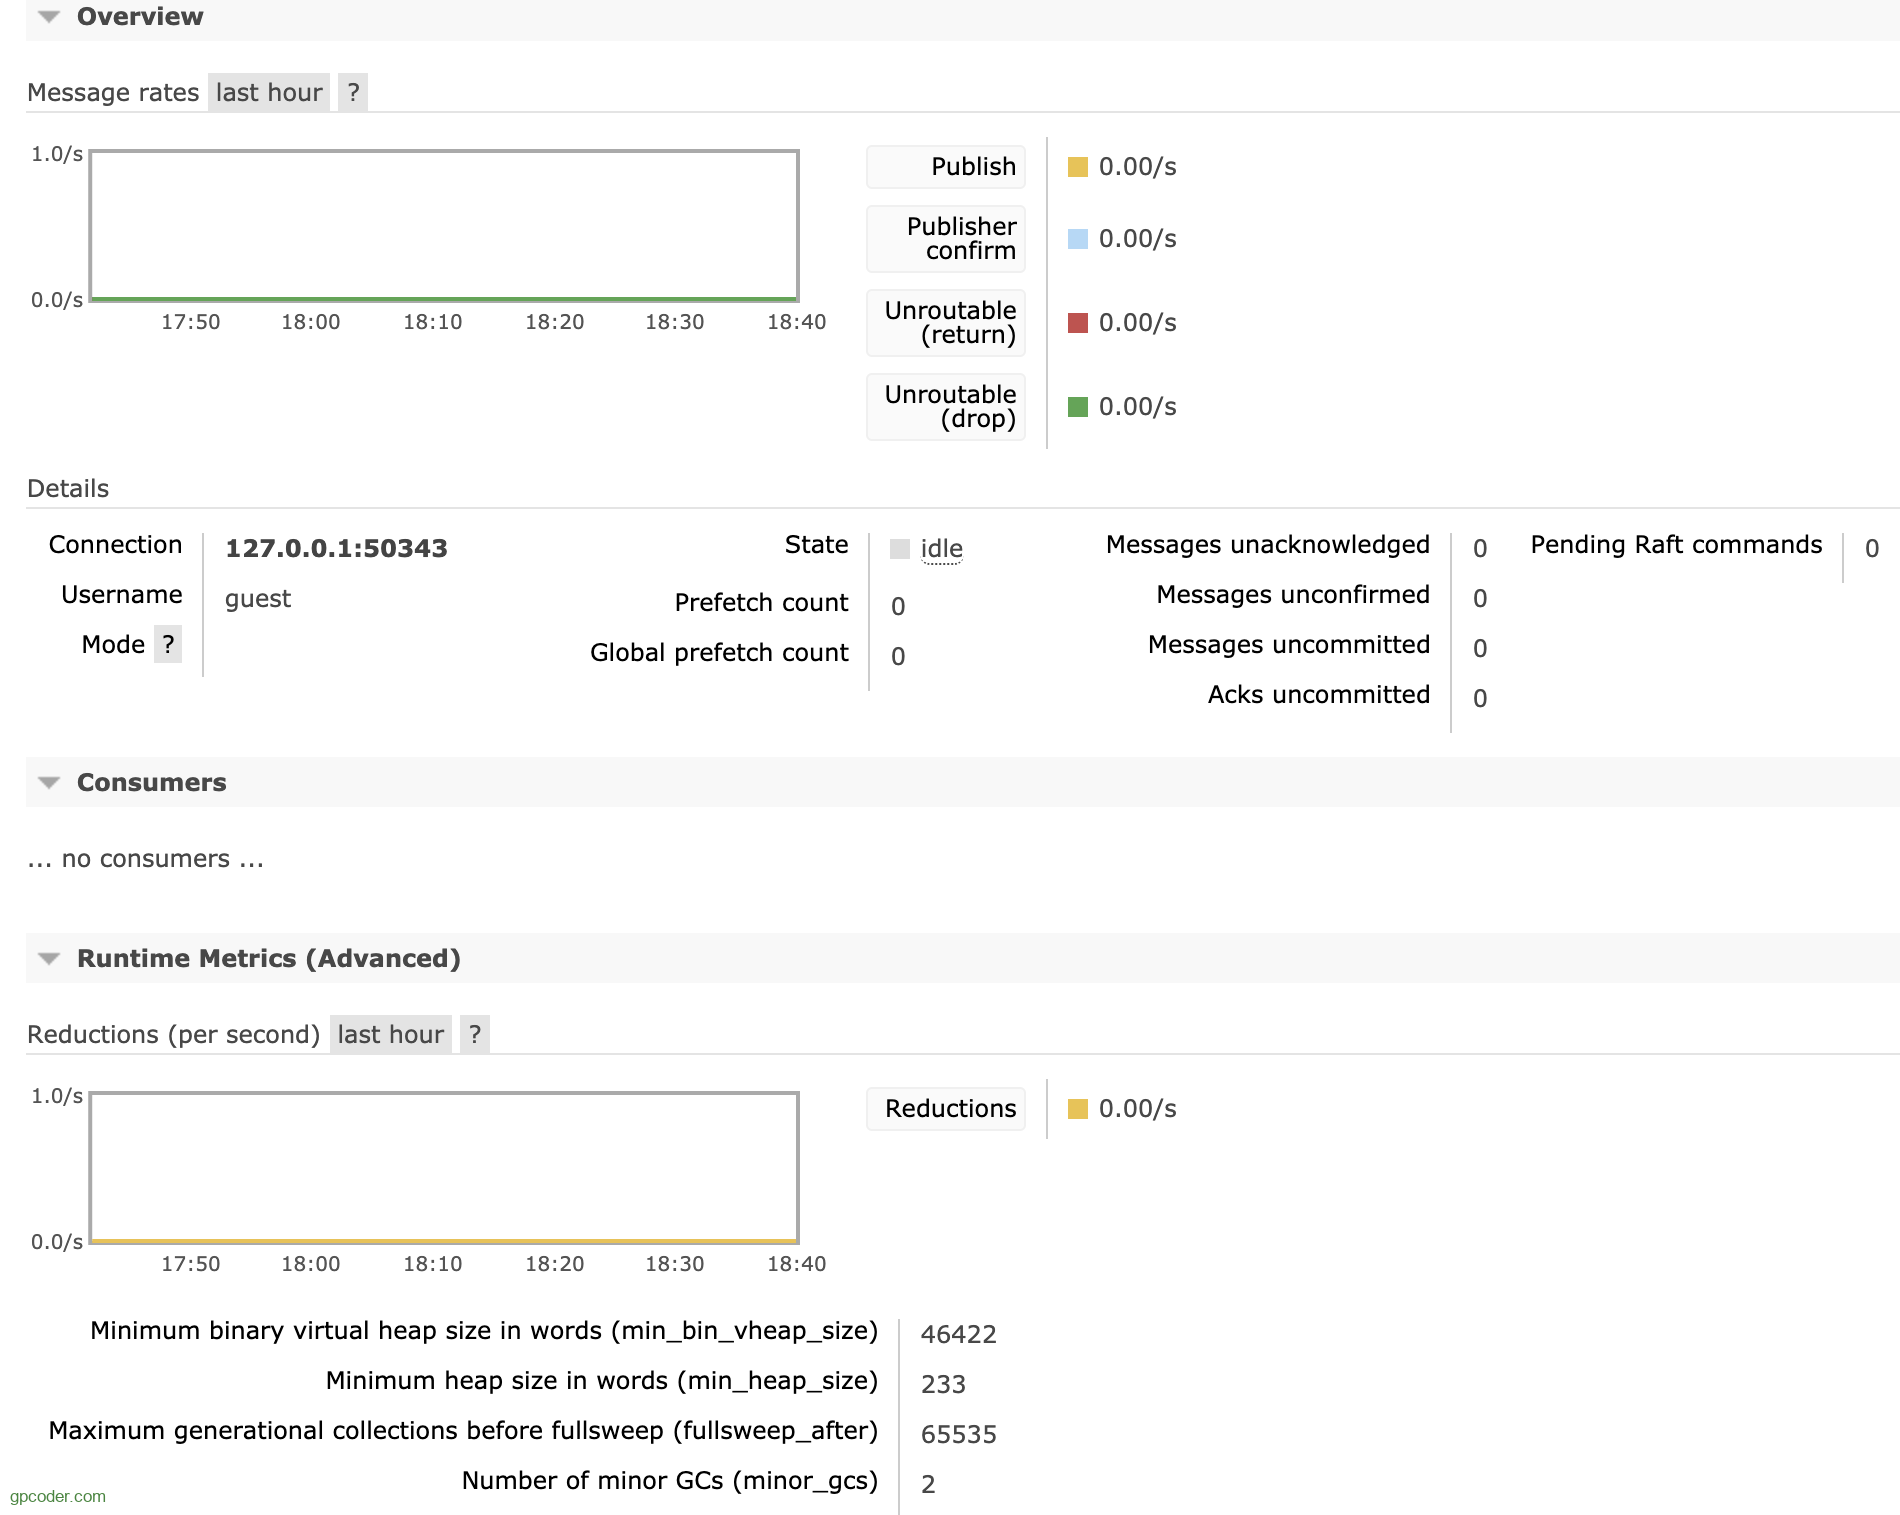
If you click on one of the Channels, you will get a detailed overview of that Channel.
Exchanges
RabbitMQ Exchange: The exchange entity is in charge of applying routing rules for messages, making sure that messages are reaching their final destination. In other words, the exchange ensures that the received message ends up in the correct queues. Which queue the message ends up in depends on the rules defined by the exchange type. A queue needs to be bound to at least one exchange to be able to receive messages. Routing rules include:
- direct (point-to-point): a message goes to the queue(s) with the binding key that exactly matches the routing key of the message.
- topic (publish-subscribe): route messages to queues based on wildcard matches between the routing key and the routing pattern, which is specified by the queue binding
- fanout (multicast): ignores routing key and broadcast a message to all queues.
- header exchanges: similar to topic exchanges, but route messages based on header values instead of routing keys
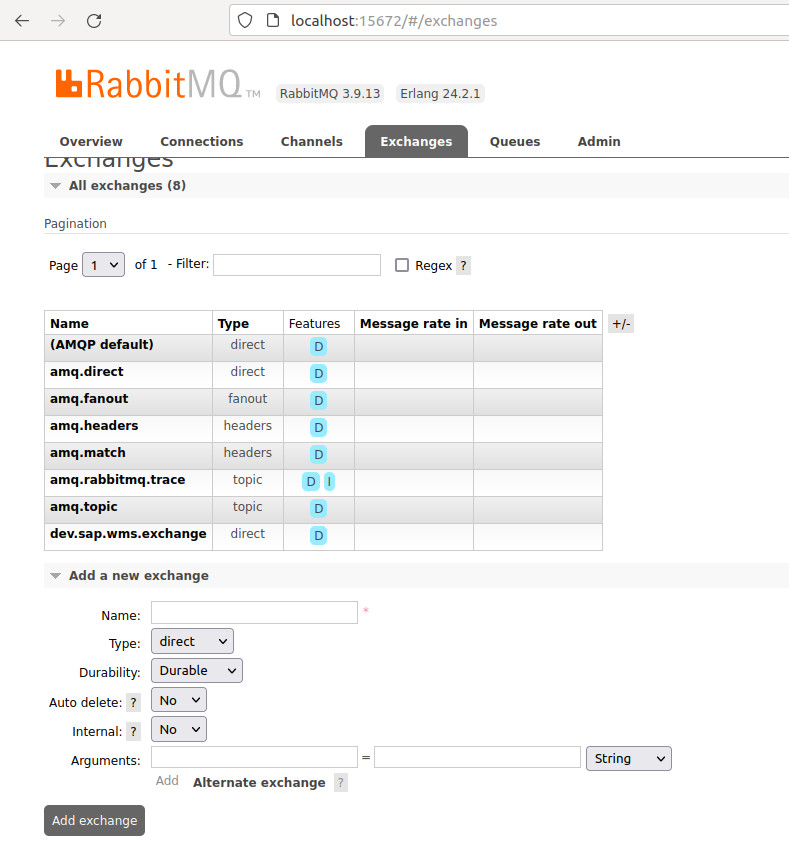
All Exchanges can be listed from the Exchange site.
- Name: displays the name of the Exhange created.
- Type : is the type of Exchange like direct, topic, fanout and header.
- Feature: displays parameters for Exchange (eg: D is durable, and AD is auto-delete).
- Message rate in/out: Rate of processing incoming and outgoing Messages.
- In this list there are several Exchange amq.* and Default Exchange (default exchange unnamed), which are created by default.
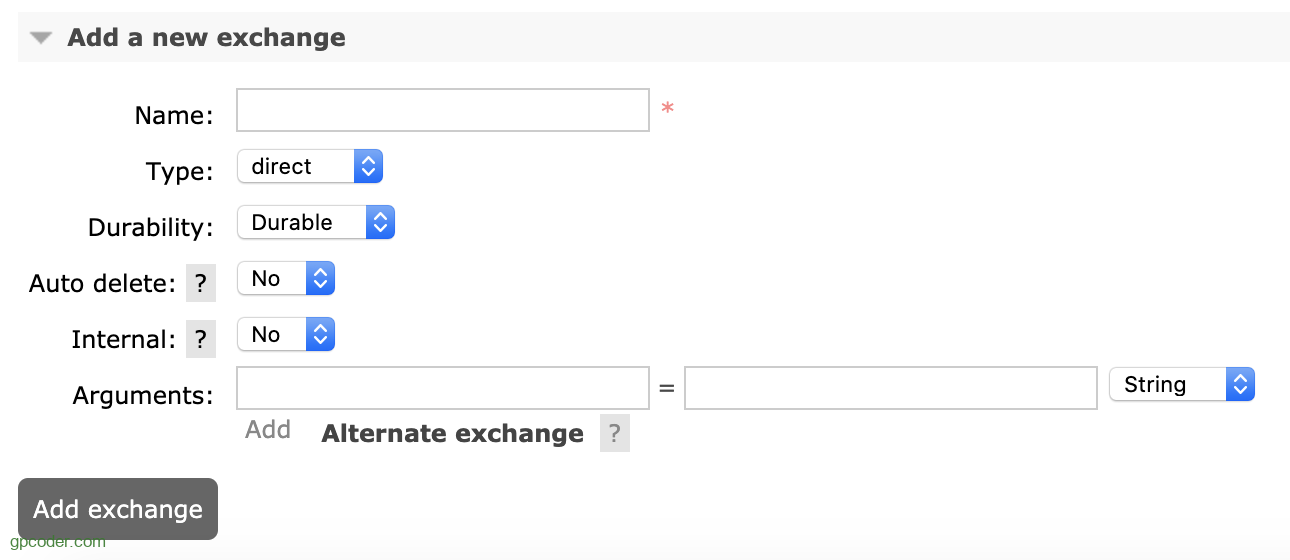
It is possible to add a new Exchange:
By clicking on the Exchange name, a detailed page about the Exchange is displayed.
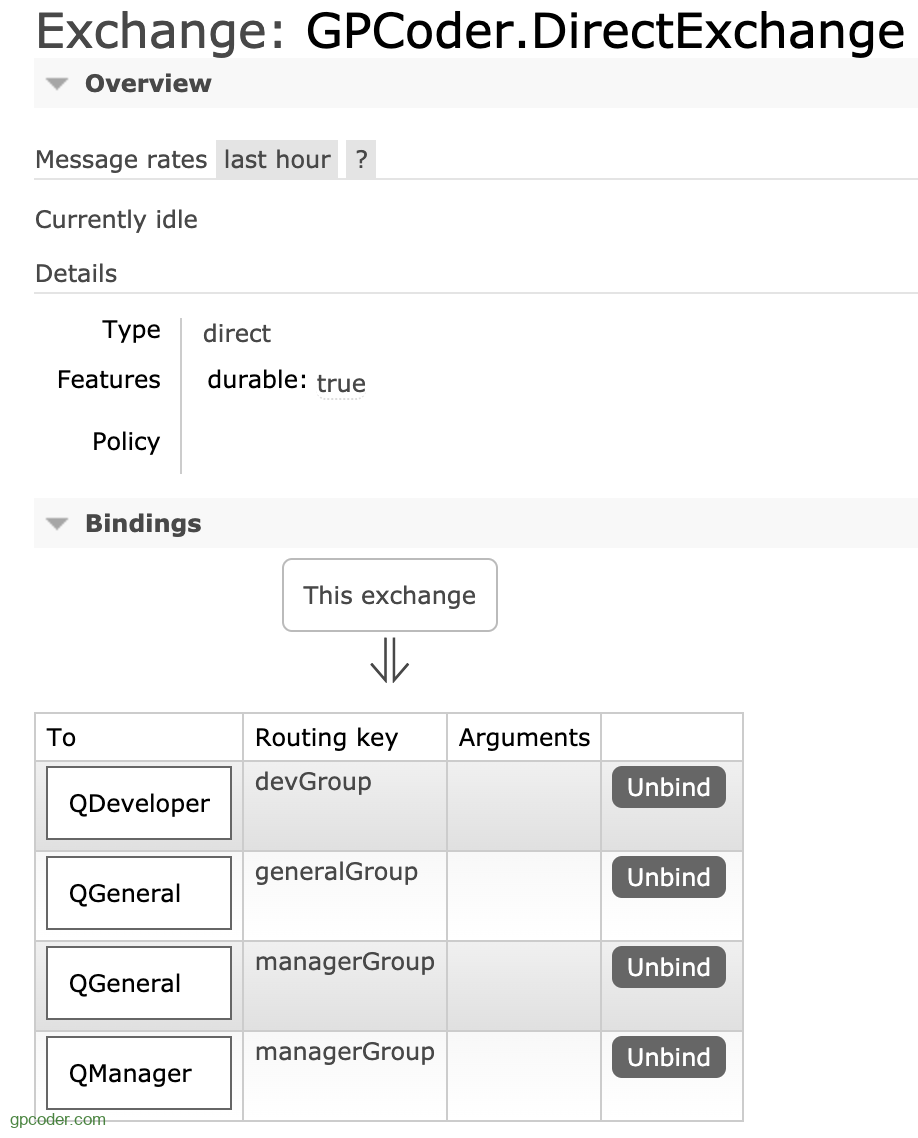
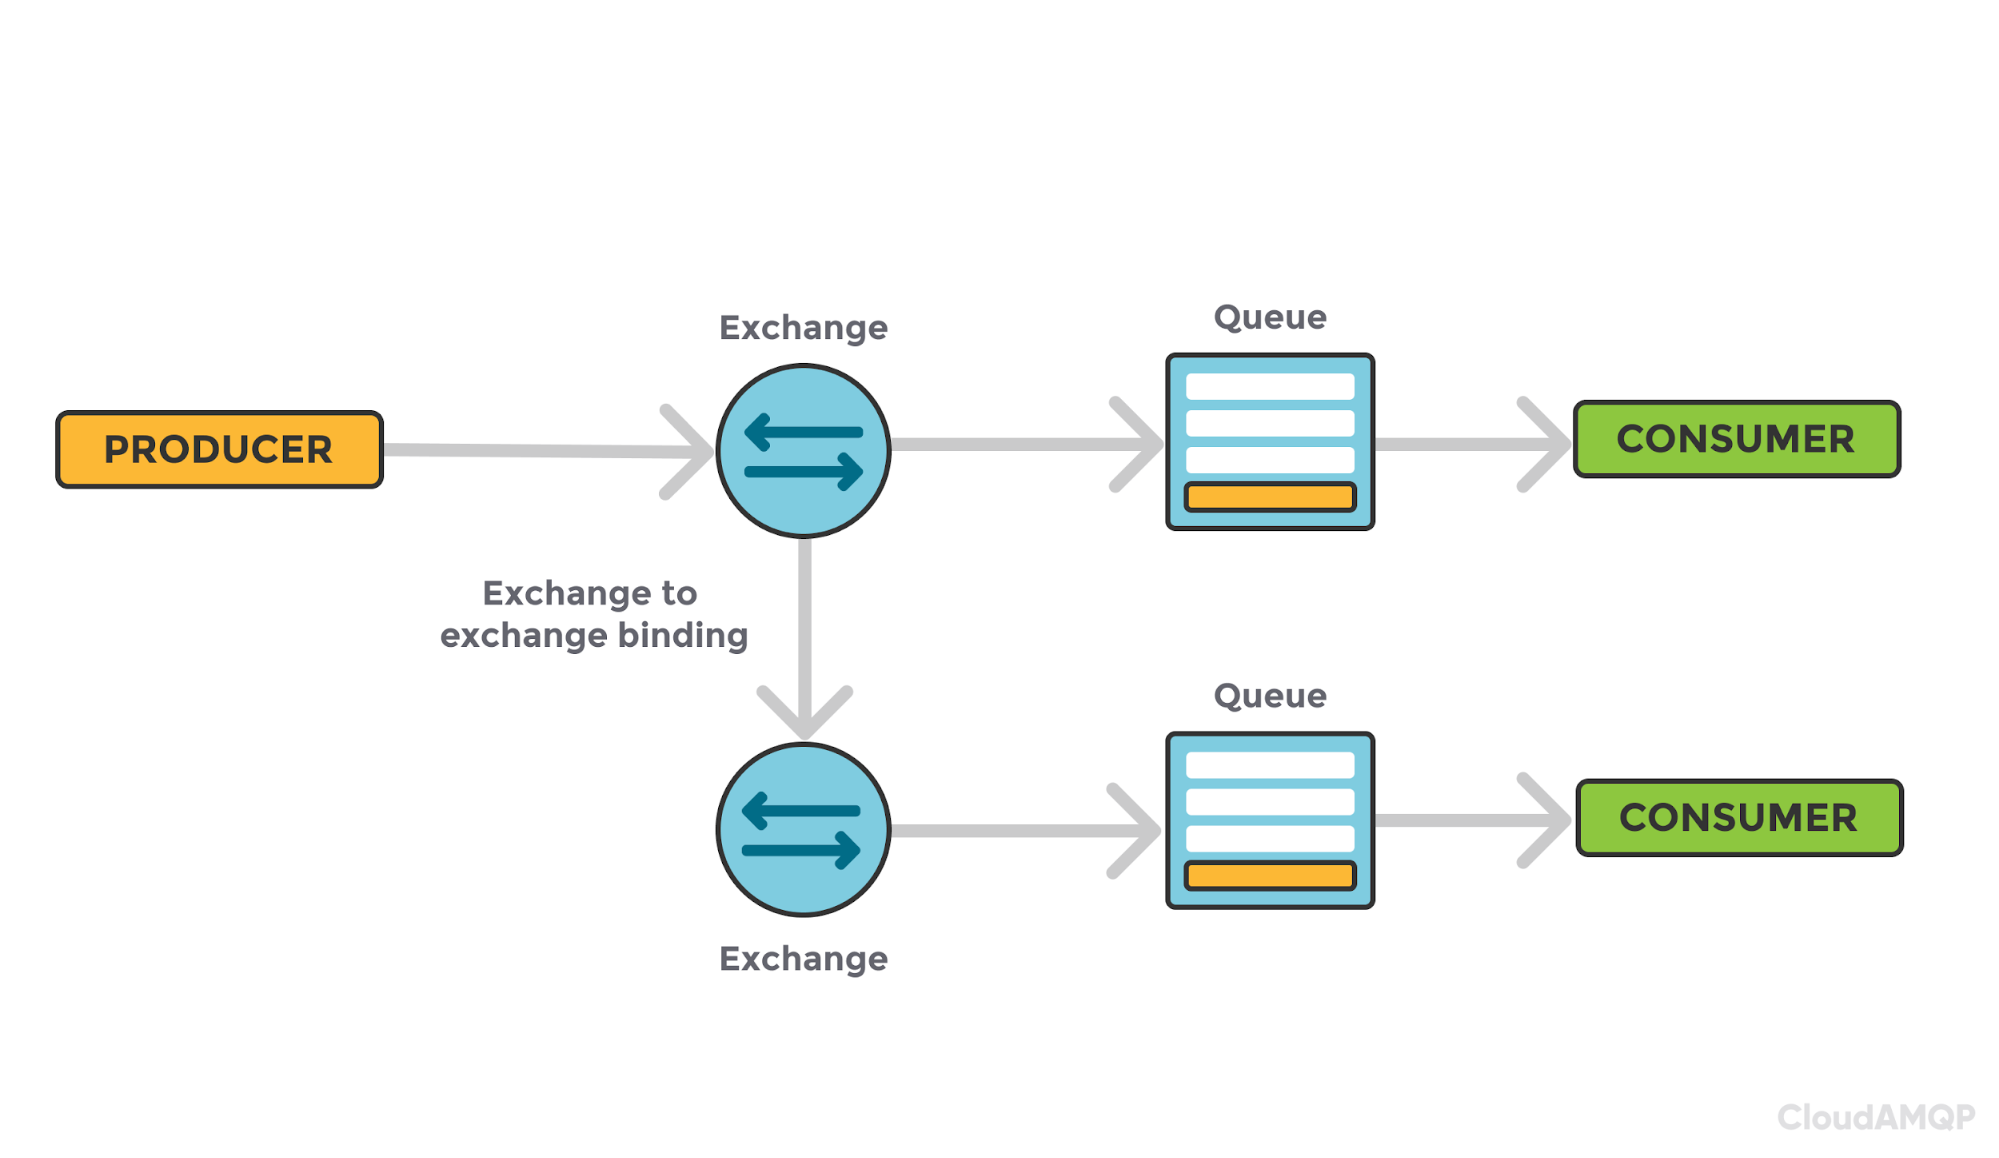
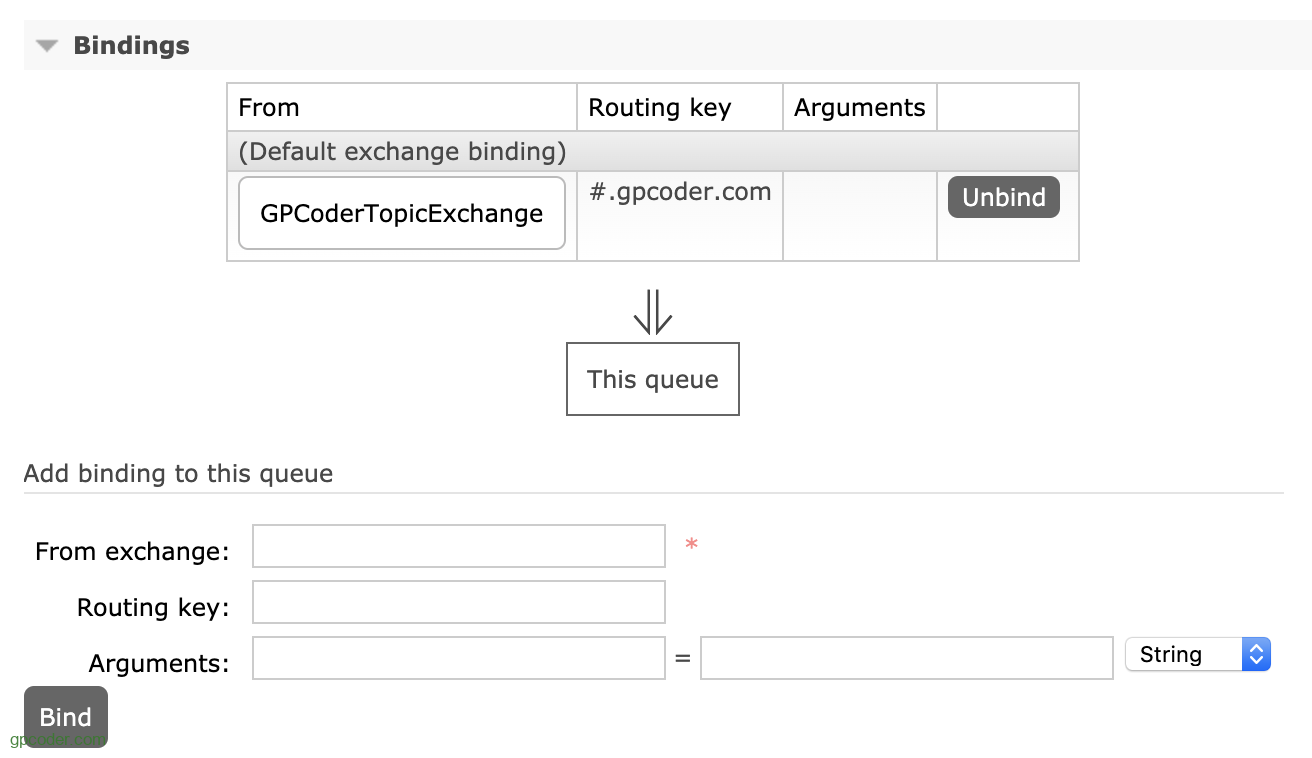
You can view and add biding for Exchange.
Essentially, a binding is a directive that tells an exchange how to send data to a queue or another exchange. The binding also contains routing keys and arguments that customize message passing.
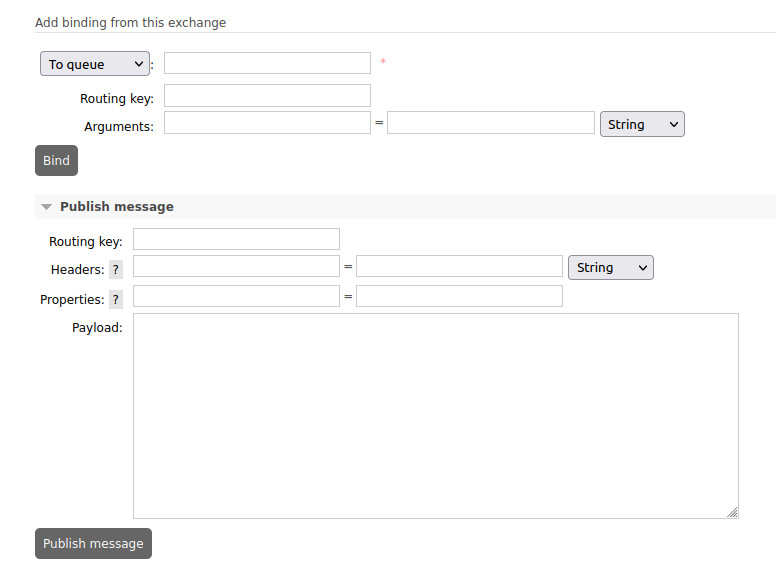
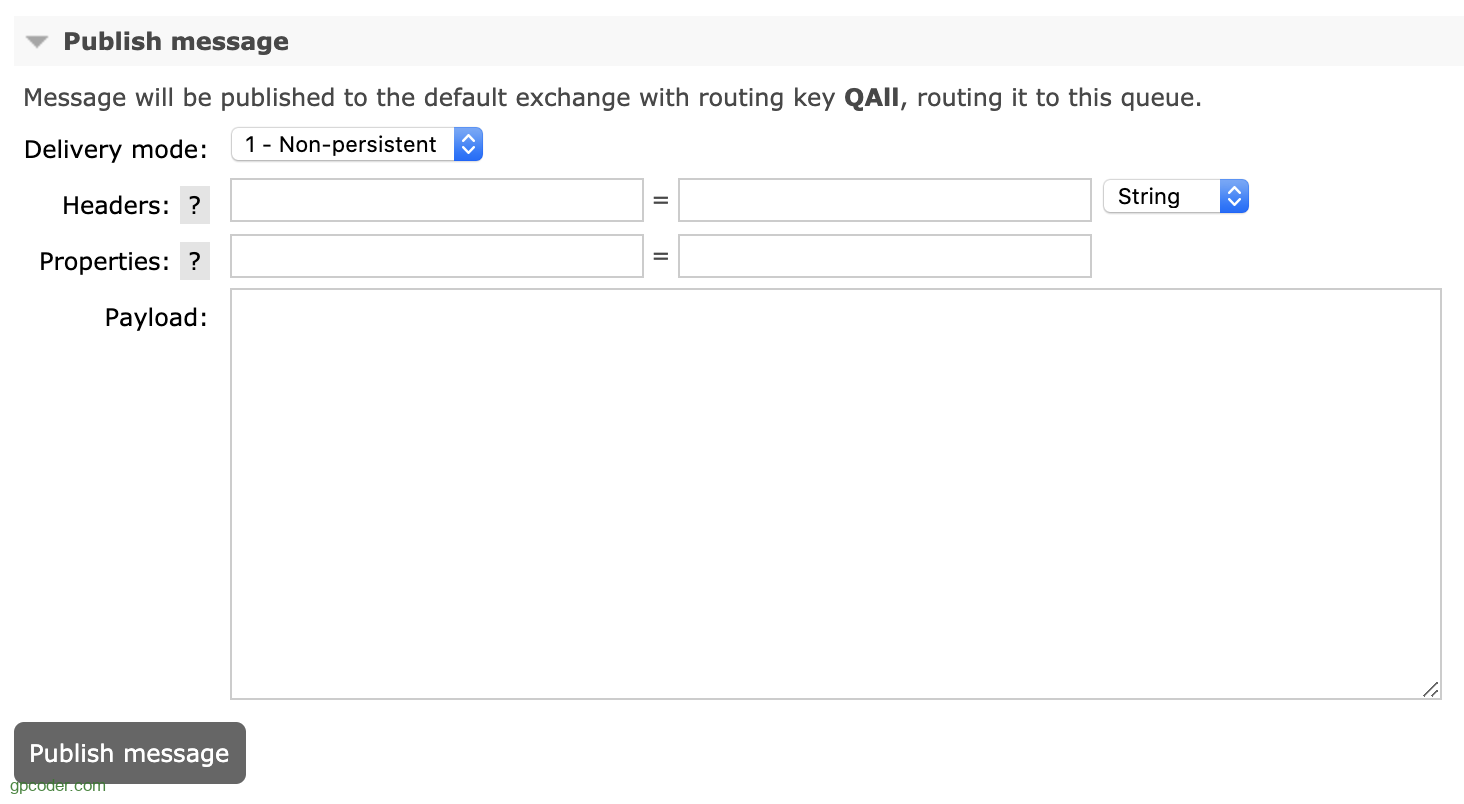
You can also publish a message to Exchange at this page:
Queues
RabbitMQ Queue: is a sequence of items; in this case, messages. The queue exists within the broker.
Queues have different parameters and arguments depending on how they were created.
- Name: displays the name of the Queue created.
- Feature: displays the parameters for the Queue (e.g. D is durable, and AD is auto-delete).
- Durable queues will be recovered on node boot, including messages in them published as persistent.
- Auto-delete queue will be deleted when its last consumer is cancelled (e.g. using the basic.cancel in AMQP 0-9-1) or gone (closed channel or connection, or lost TCP connection with the server).
- Message Ready: displays the number of messages available to be sent.
- Message Unacked: is the number of messages that the server is waiting for confirmation.
- Message Total: the total number of messages queued in the Queue.
- Message rate in/out: Rate of processing incoming and outgoing Messages.
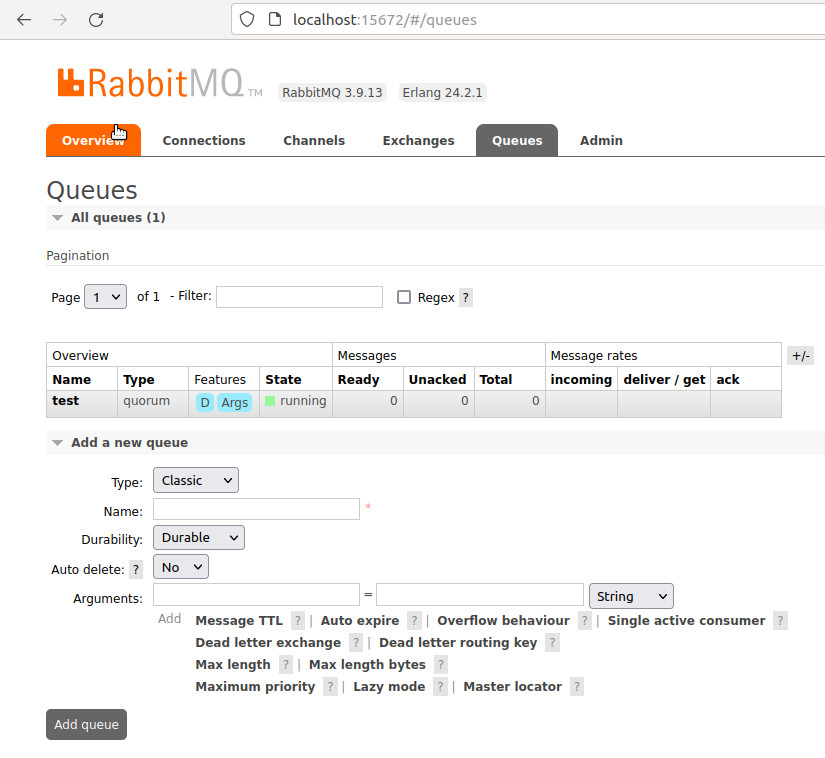
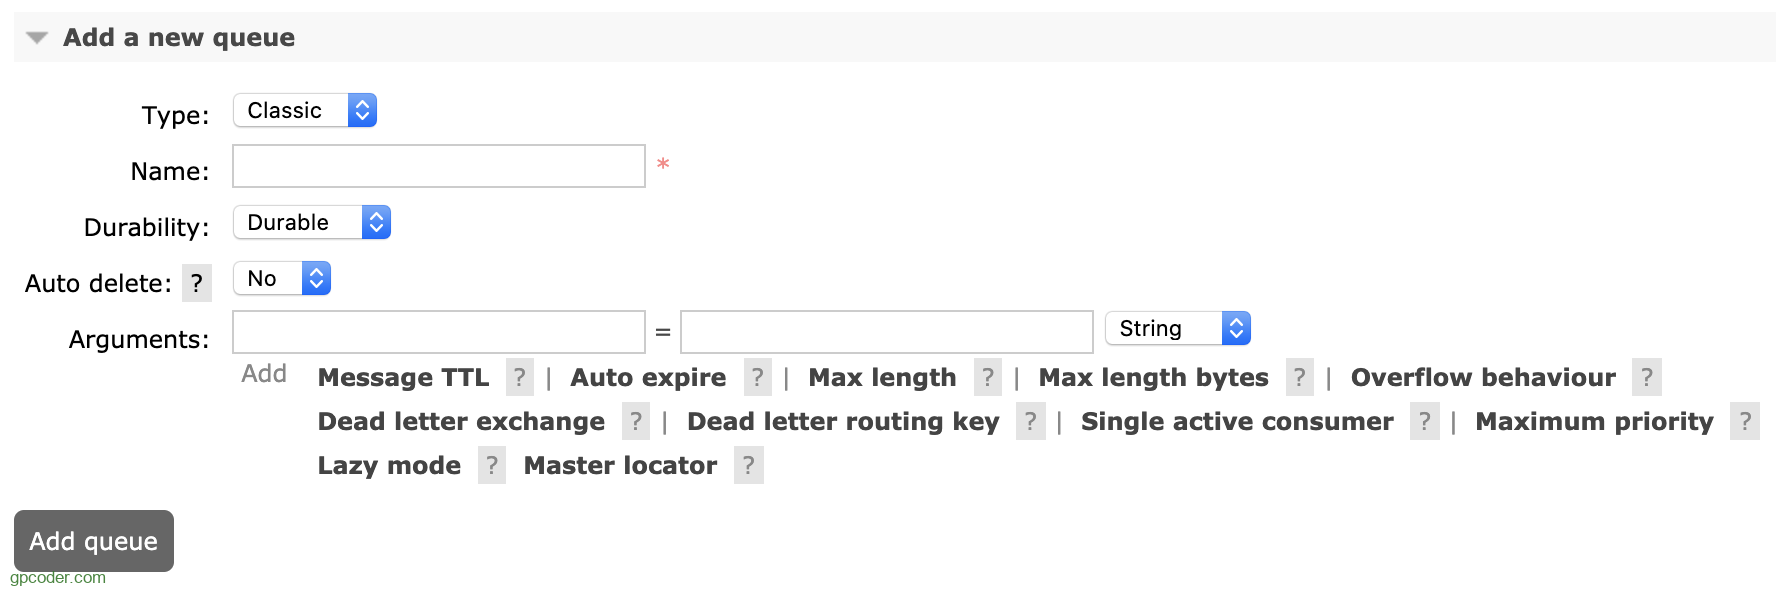
A new Queue can be added:
By clicking on the Queue name, a Queue detail page will be displayed.
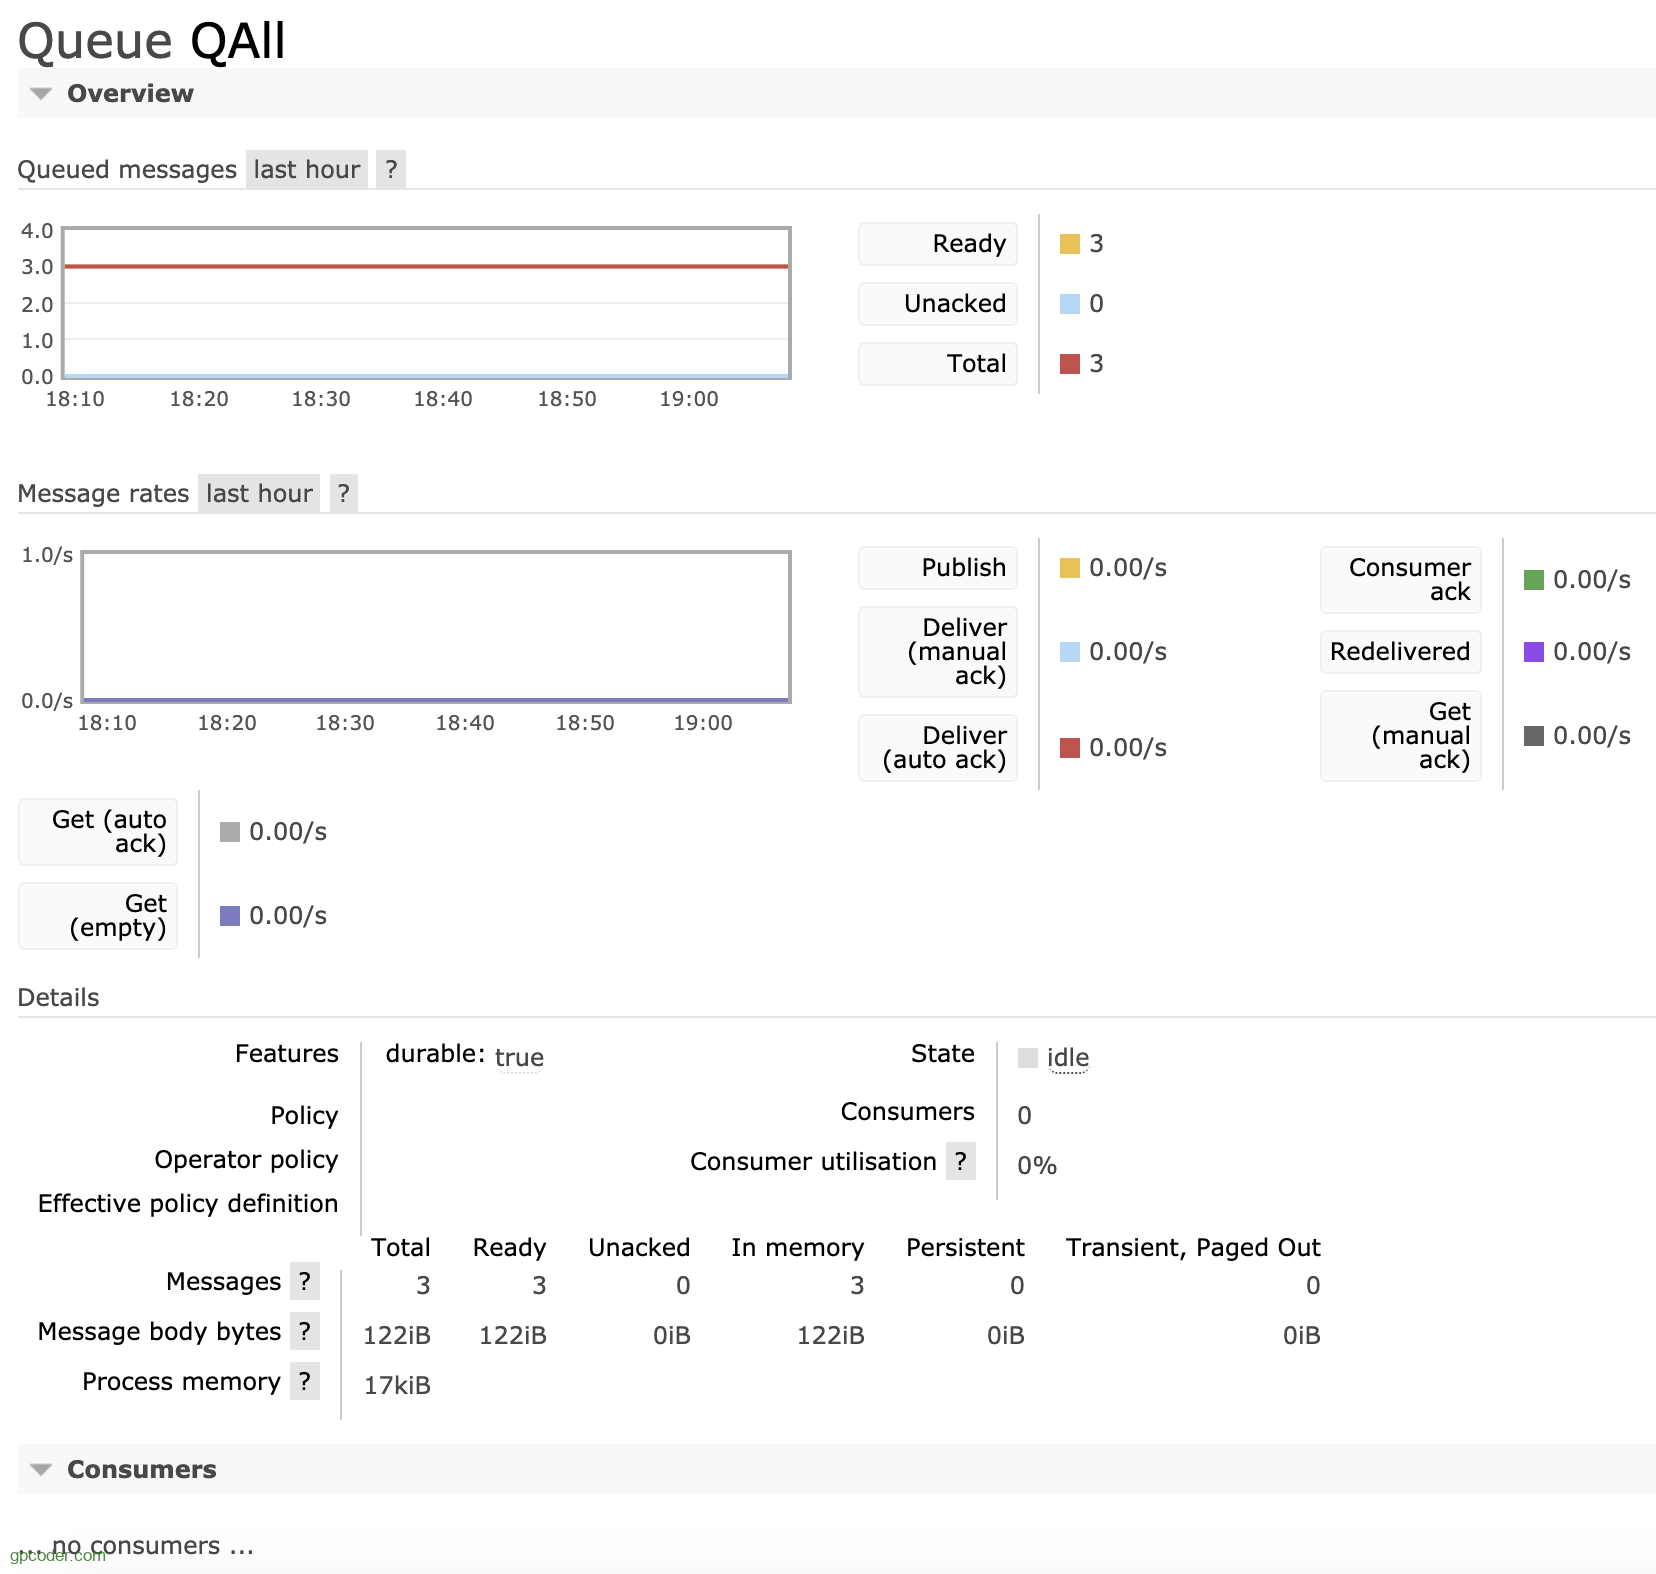
Consumer: is an application (or application instance) that consumes messages. The consumer page displays consumers/ channels that are connected to the Queue.
Can view and add constraints for Queue.
It is also possible to publish a message to the Queue:
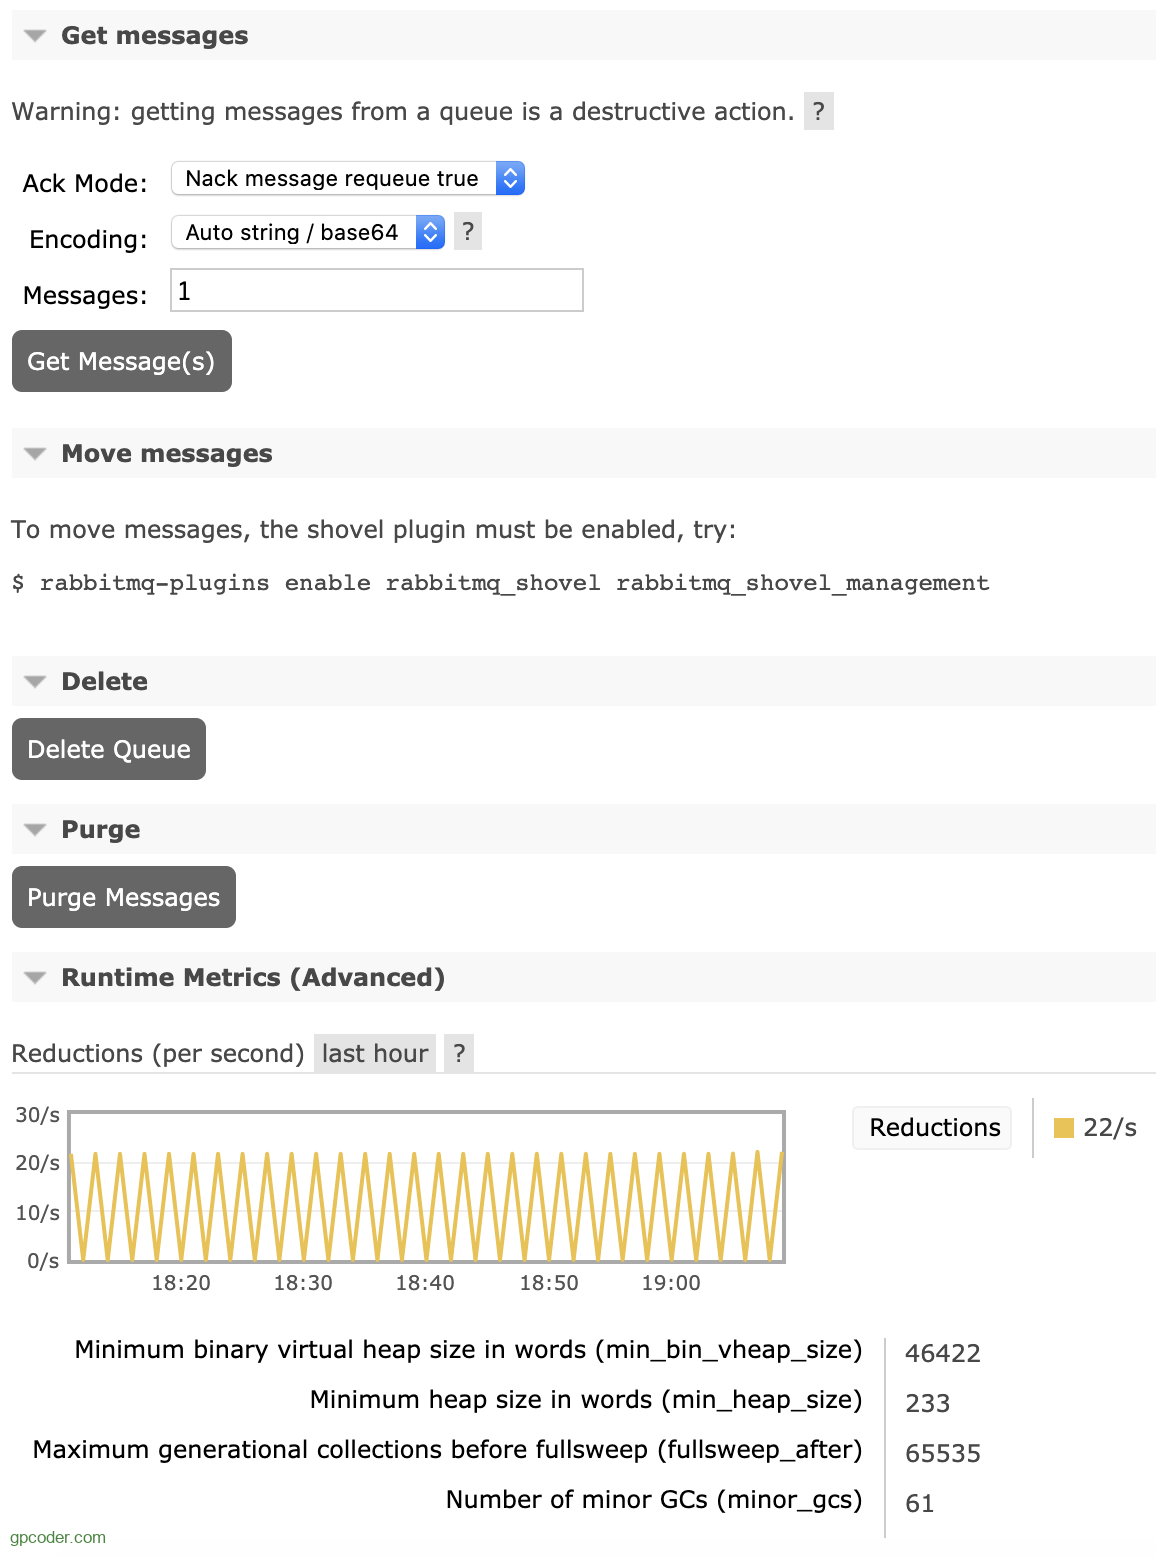
Queue can be deleted by clicking the Delete Queue button or delete all Messages in the Queue by clicking the Purge Messages button .
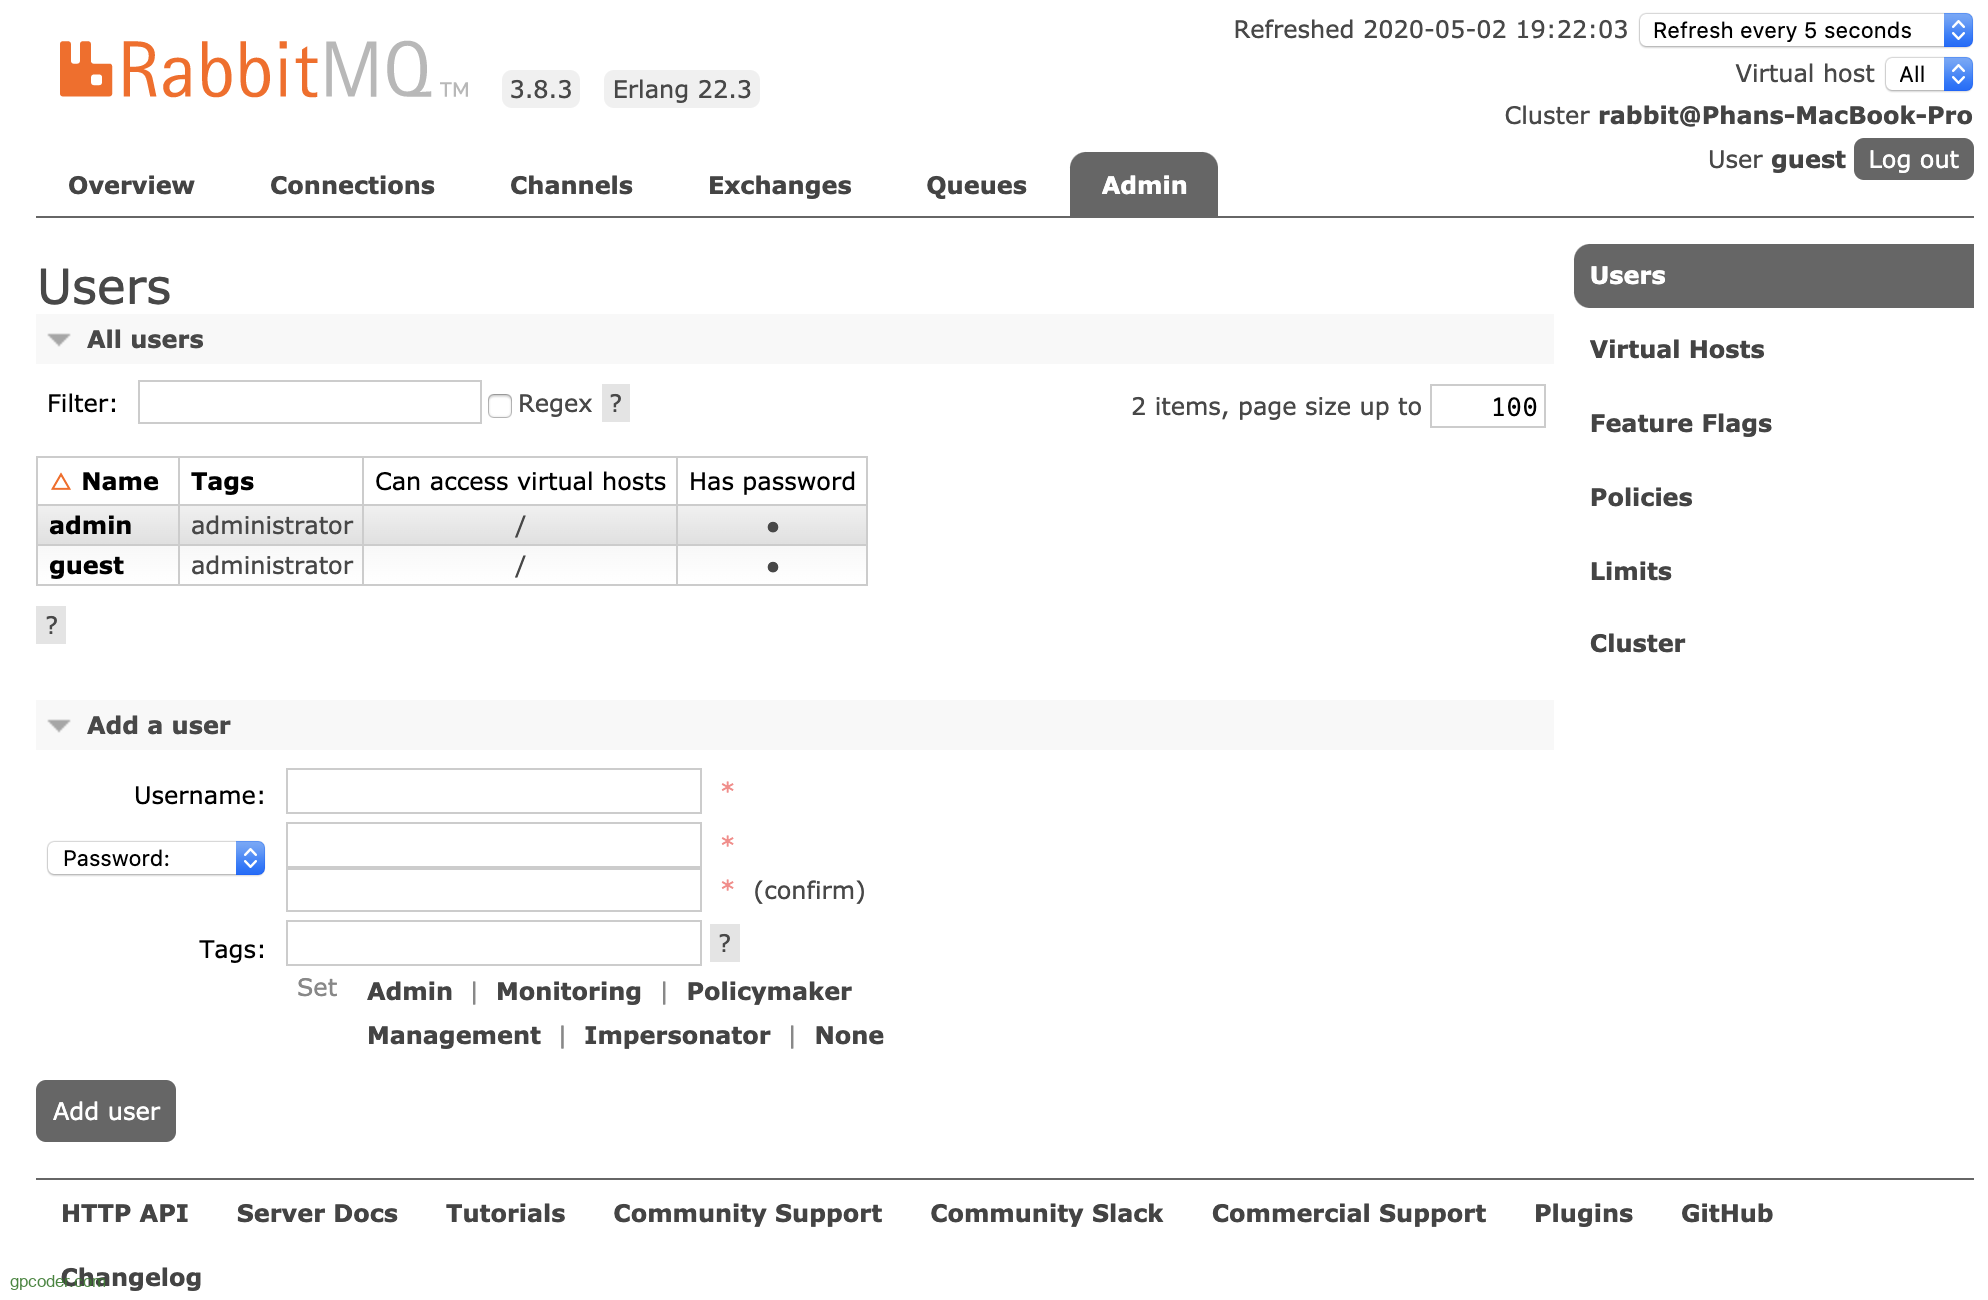
Admin page
From the Admin page, we can add m users, change user permissions, set up vhosts, policies, limit the number of connections or change the cluster name.
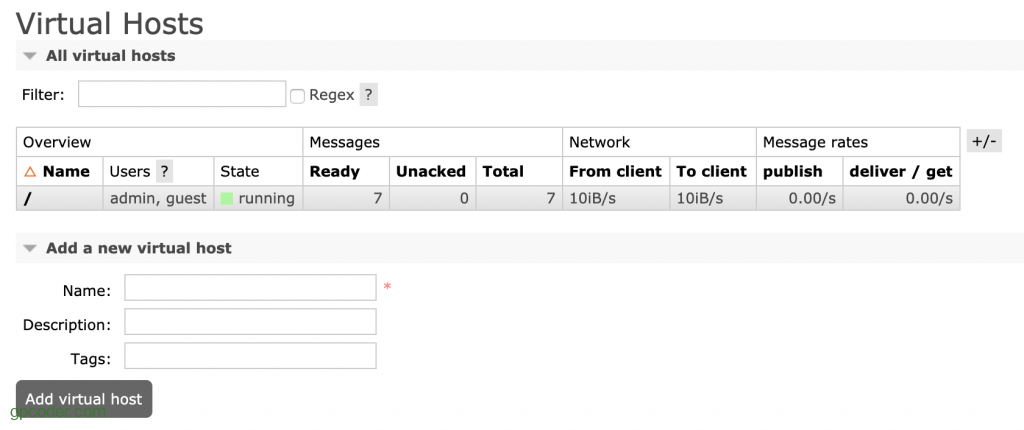
Click on the Virtual Hosts menu on the left to view a list or add new Virtual Hosts:
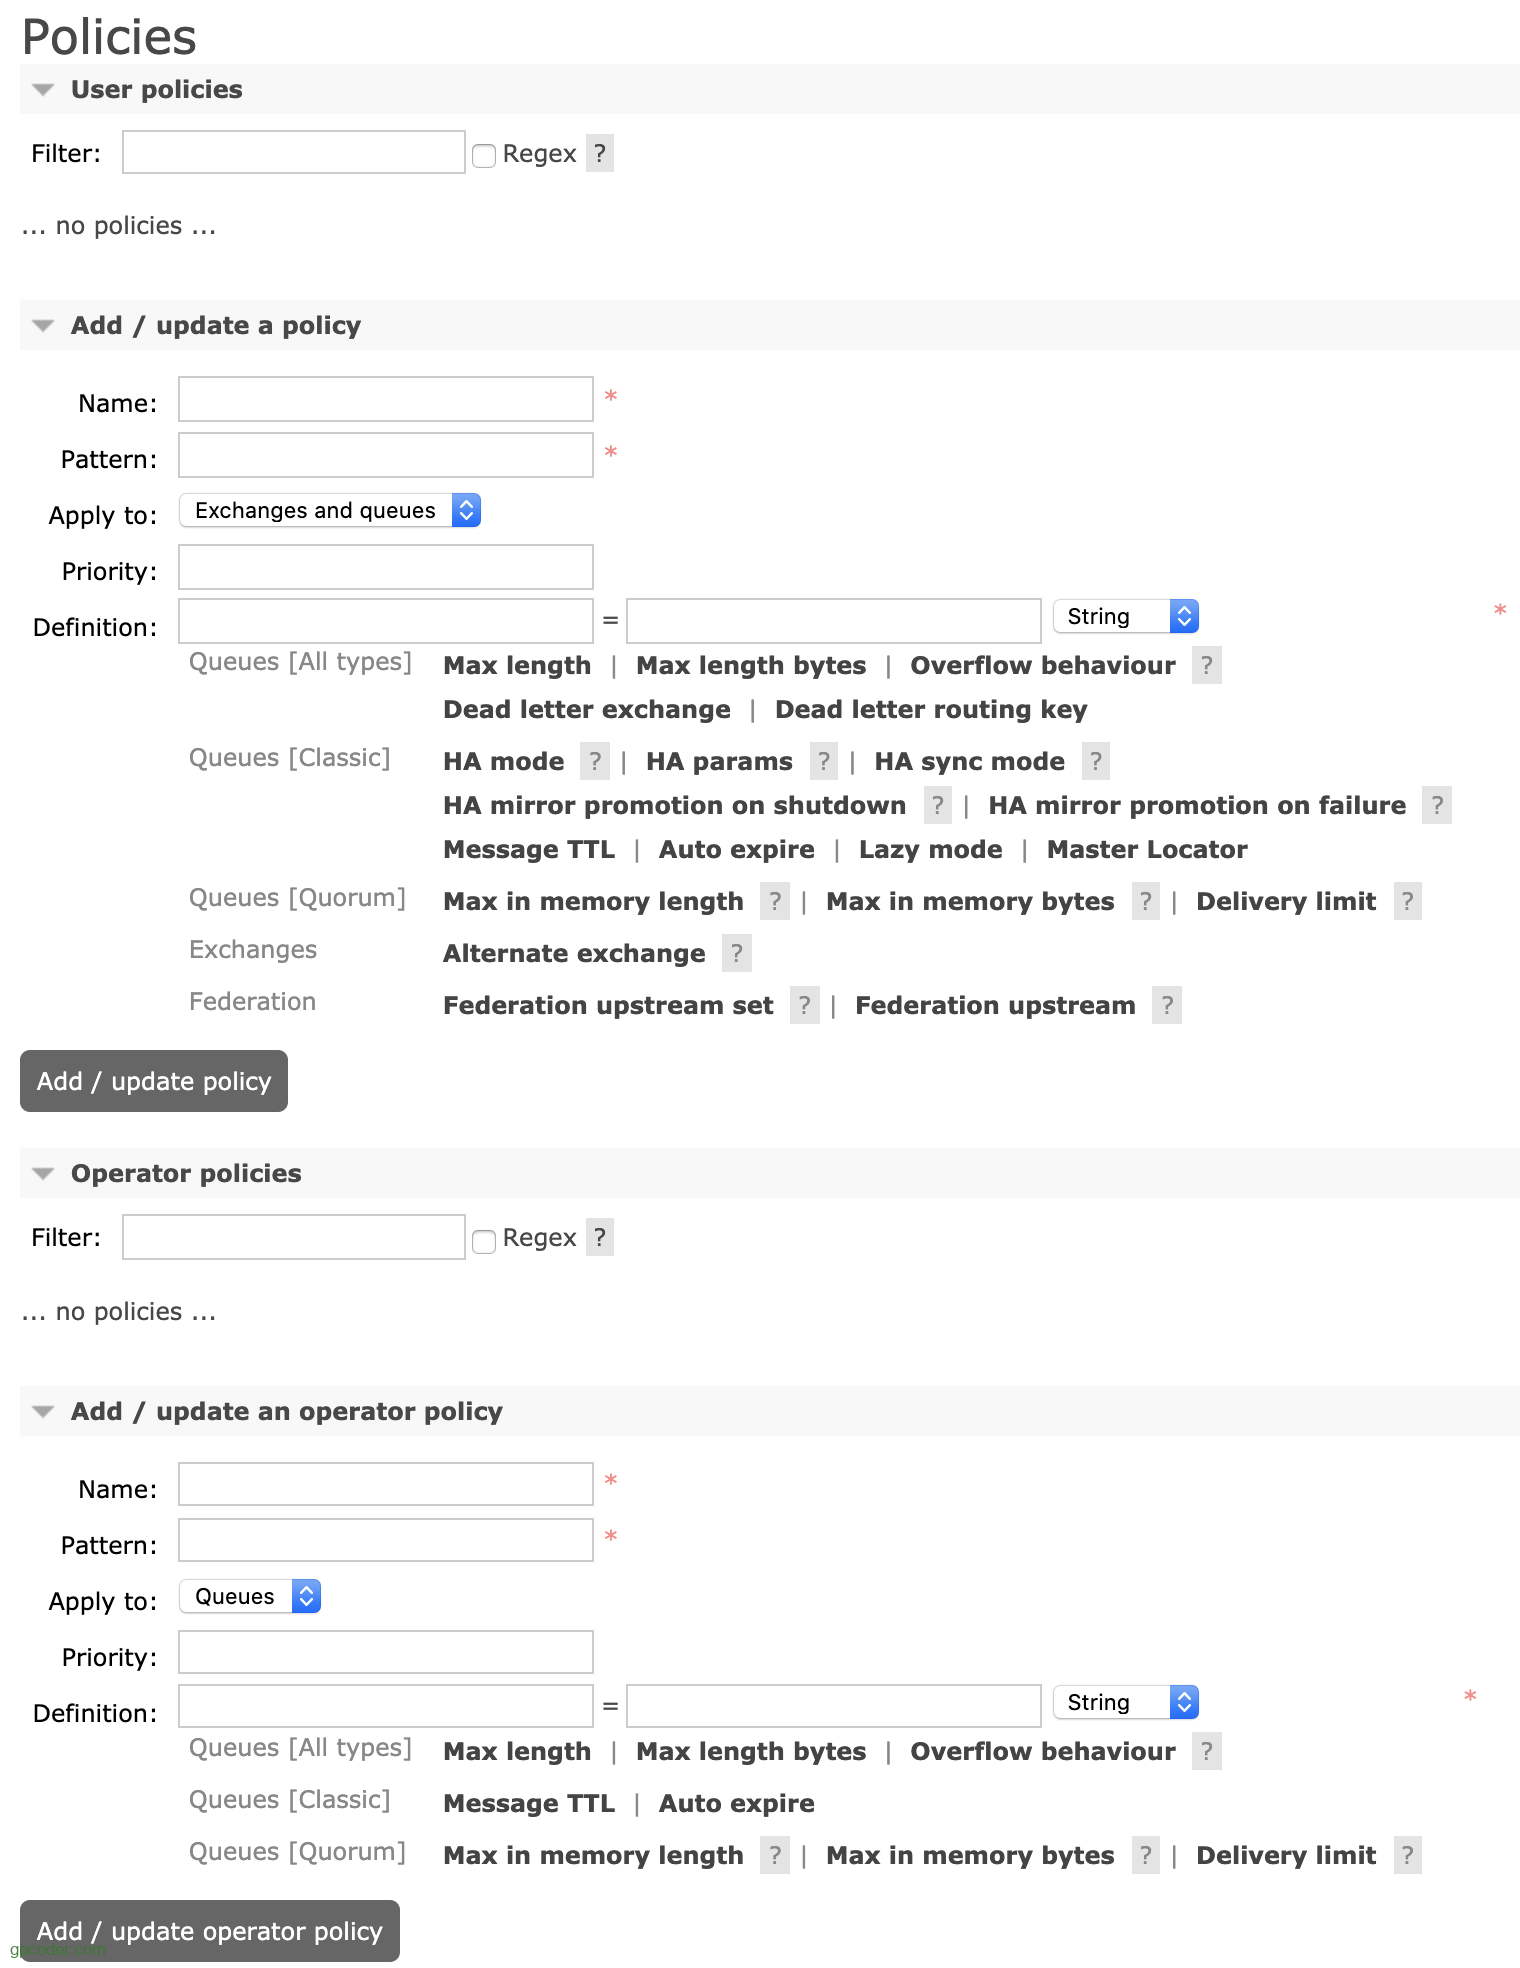
Policy can be added or updated in the Policies sub-menu on the left:
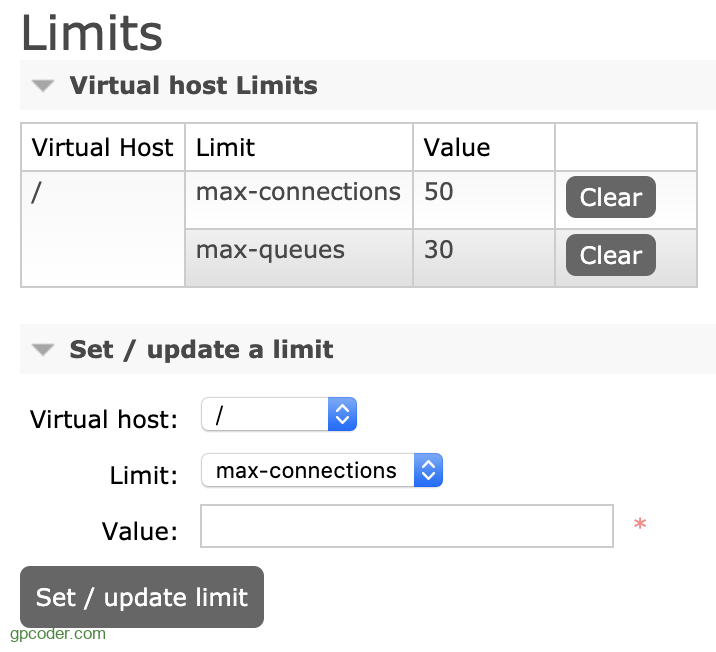
Similarly click on the Limits sub-menu to limit the number of Connections, Queues of a Virtual Host.
By default, RabbitMQ names the cluster rabbit@<computer name>, and we can rename it in the cluster sub-menu.
This article mainly introduces you to the features that we can use from RabbitMQ Management Interface.

Comments are closed.